Seafarers
The Seafarers page is a database of people your company has interacted with in any way: for example, they have worked for you before or they have applied for one of your jobs.
Understanding the Seafarers page
Log into your Martide account and click on Seafarers in the menu on the left. You’ll go to this page:
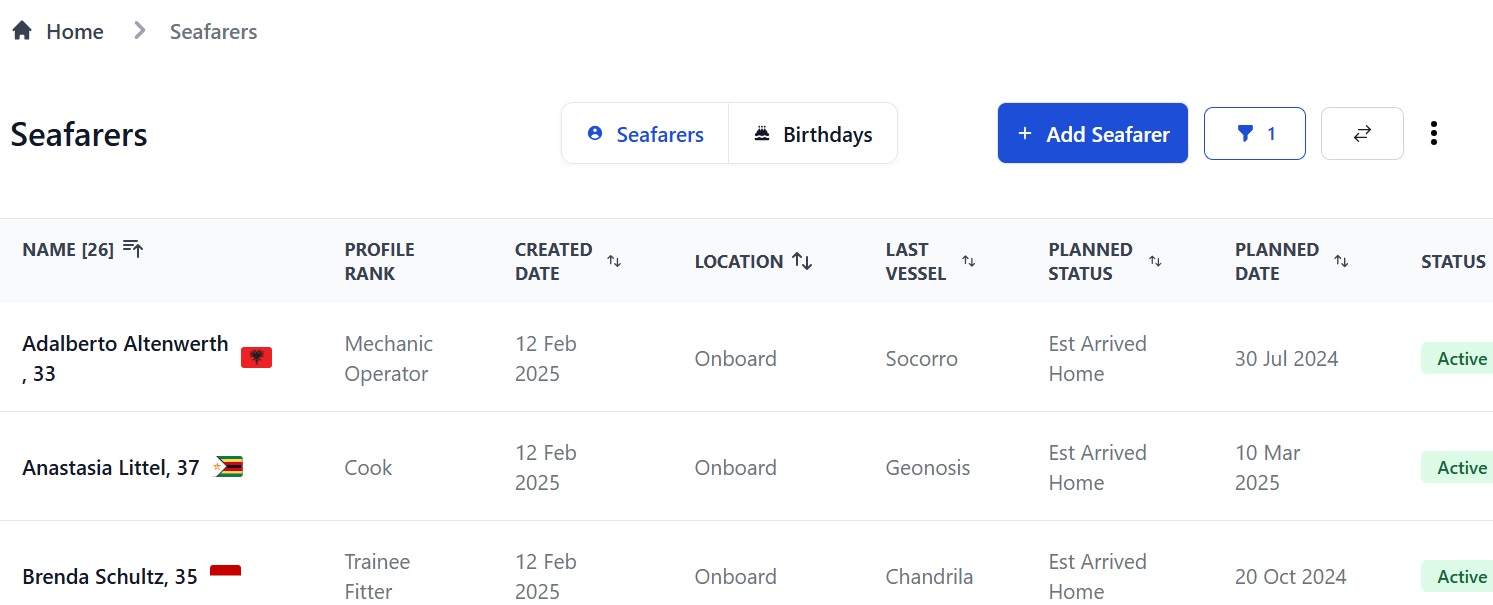
Here you can:
- View Active seafarers. (The default view shows only Active seafarers.)
- Add a new seafarer by clicking the Add Seafarer button at the top.
- Go to a seafarer’s profile by clicking their name.
- Filter seafarers by General, Assessments, Documents, Employment & Work History, Location, Medical, Onboard, Personal, Planning, Status, Visas or Appraisals by clicking the funnel icon at the top of the page.
- See an overview of seafarer profiles by clicking the 2 arrows at the top.
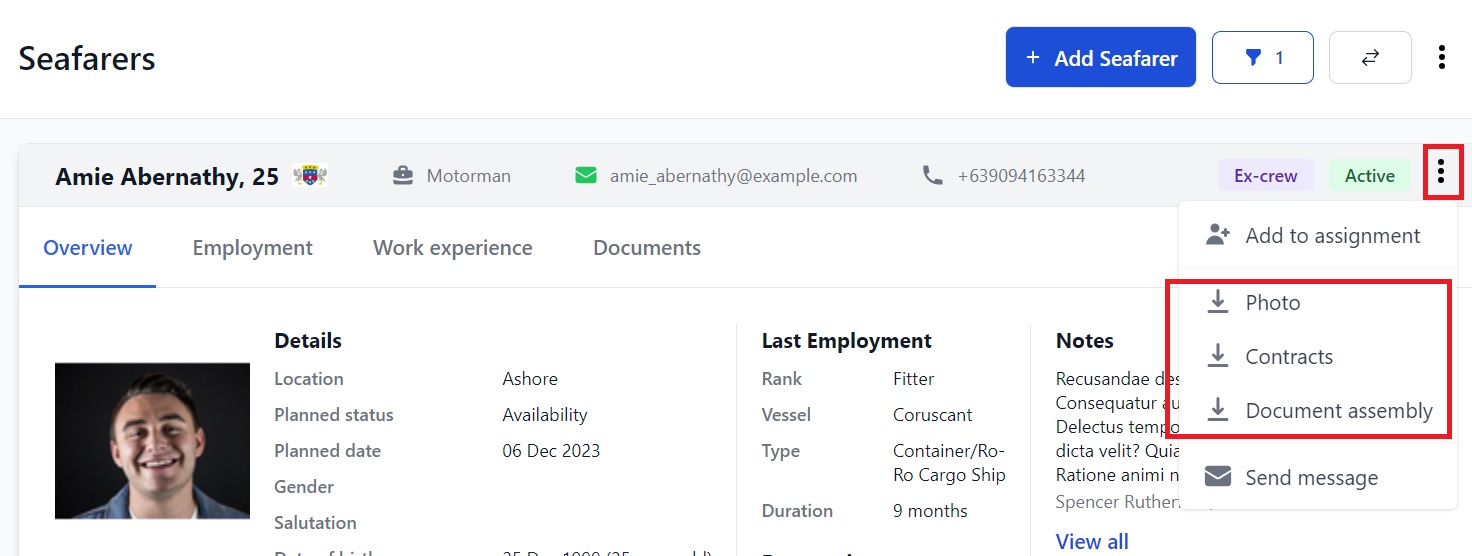
- Download seafarer profiles, employment history, work experience, documents and contracts by clicking the 3 dots at the top.
- Click the Birthdays button to see a list of seafarers who have birthdays in the next 30 days.
How to add a new seafarer to the database
Click the Add Seafarer button at the top of the page:

That will open this pop-up box:
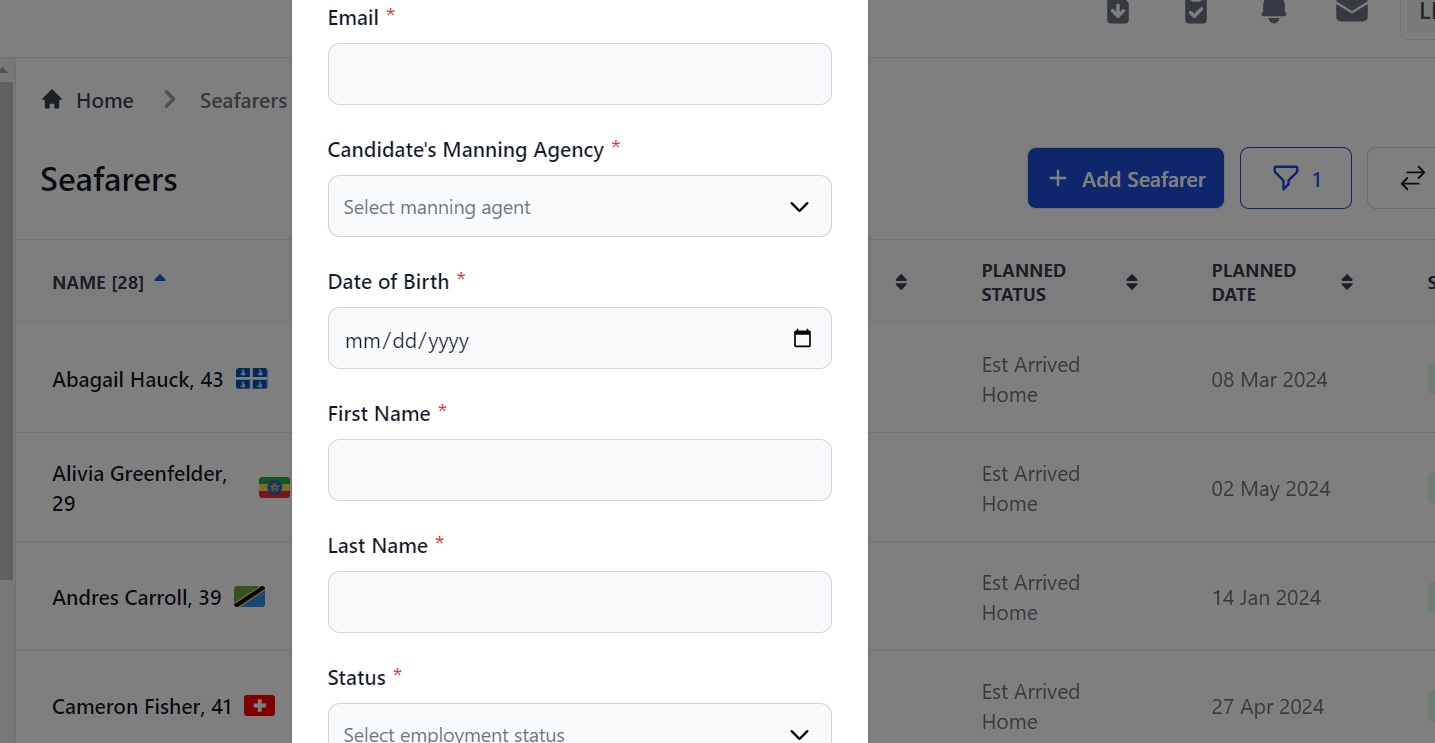
Here you can:
- Enter the seafarer's email address.
- Select the manning agent (Employers only - manning agents will not see this box.)
- Enter the seafarer's date of birth and first and last names.
- Select the seafarer's employment status.
Click Add Seafarer and you'll go to their profile page where you can fill in their information. They will then appear on the Seafarers page.
How to check and/or edit a seafarer's profile
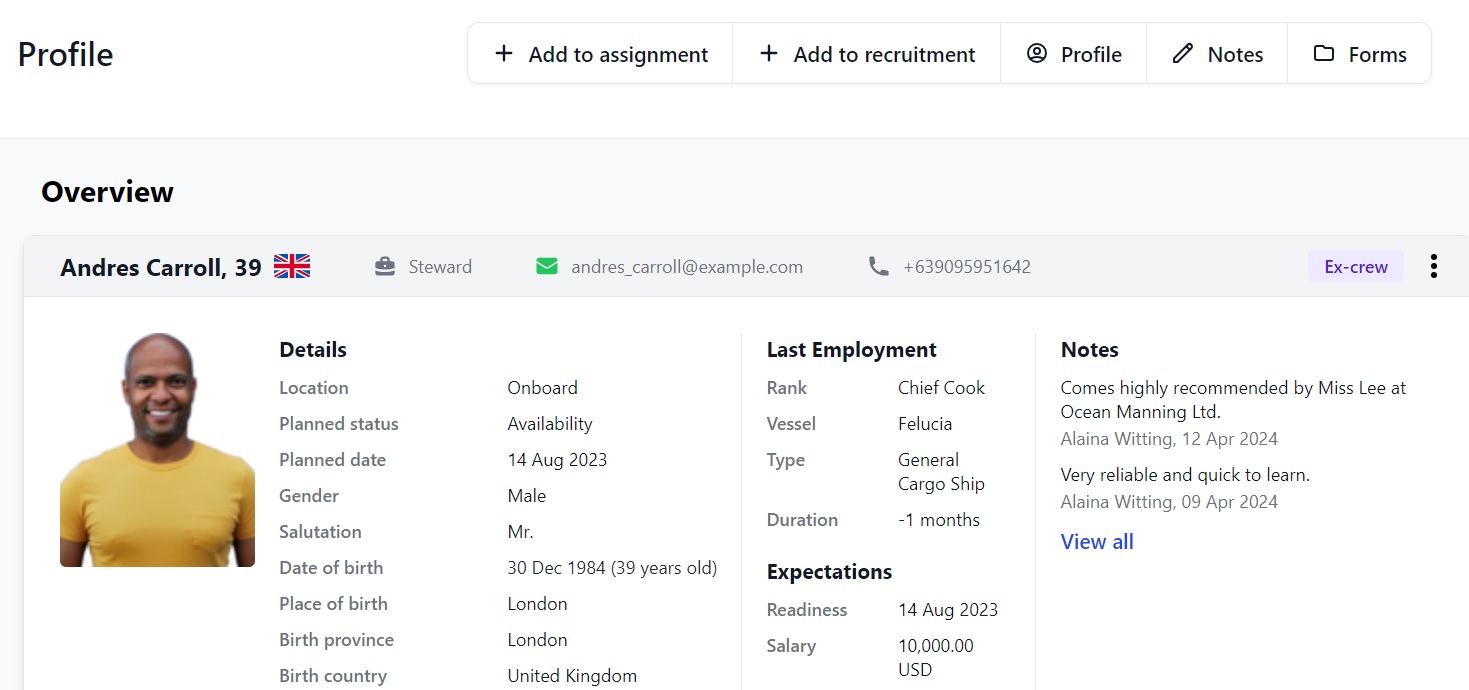
You can see an overview of all seafarers on the Seafarer's page by clicking the two arrows at the top or you can go to an individual profile by clicking on their name when the screen is in list format or on their name in the overview. You will go to their profile page:
The profile is long so to make it easier to find the info you need, click a header in the menu on the left under Seafarers to go to that section:
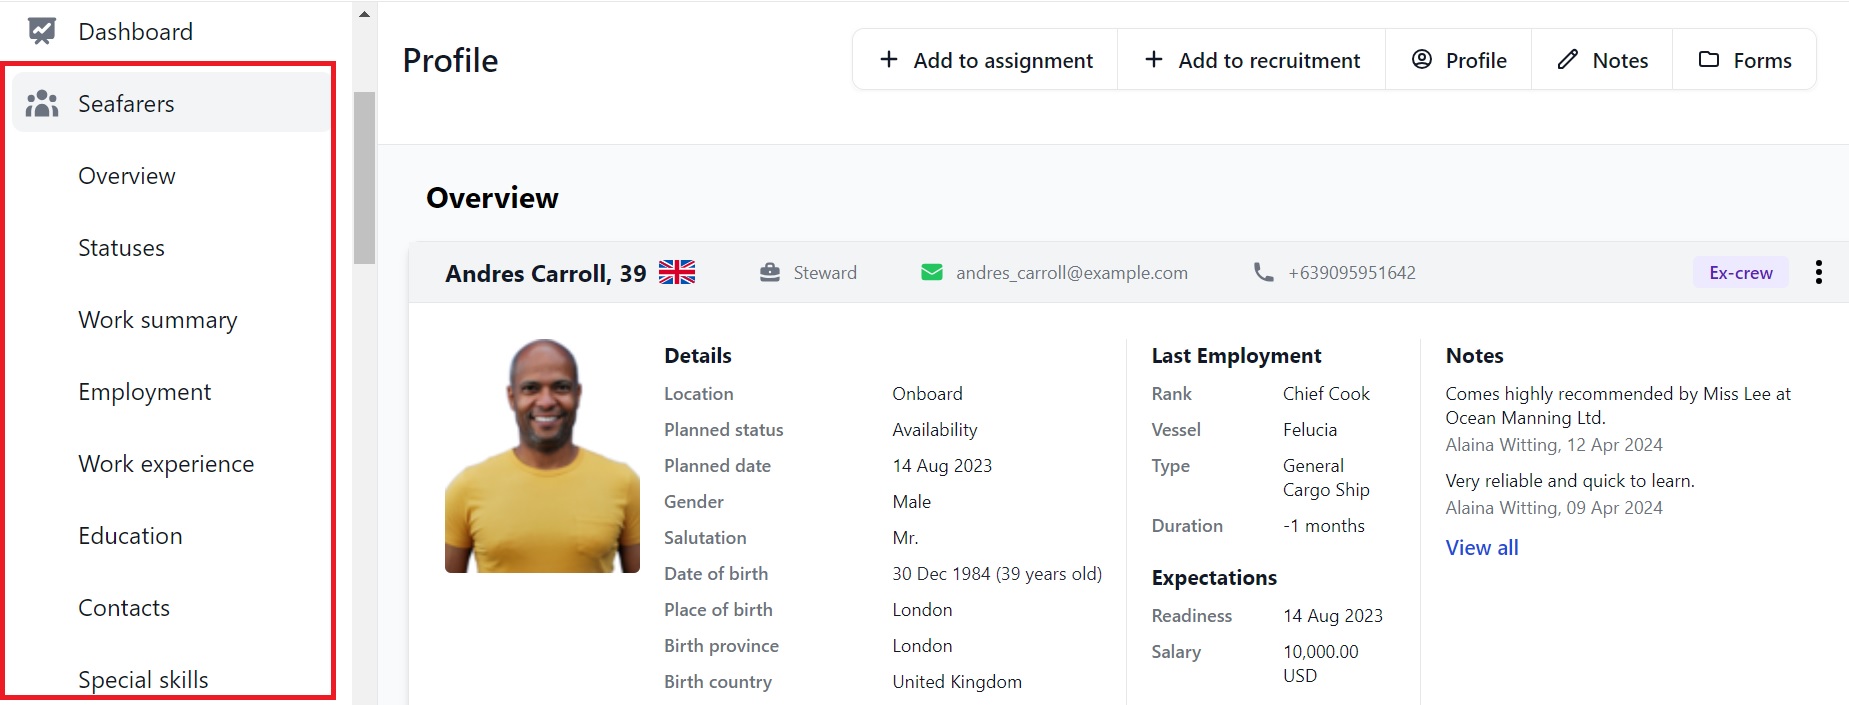
Here you can:
- See an overview of the seafarer's personal details, last employment, expectations and any notes that have been made about them.
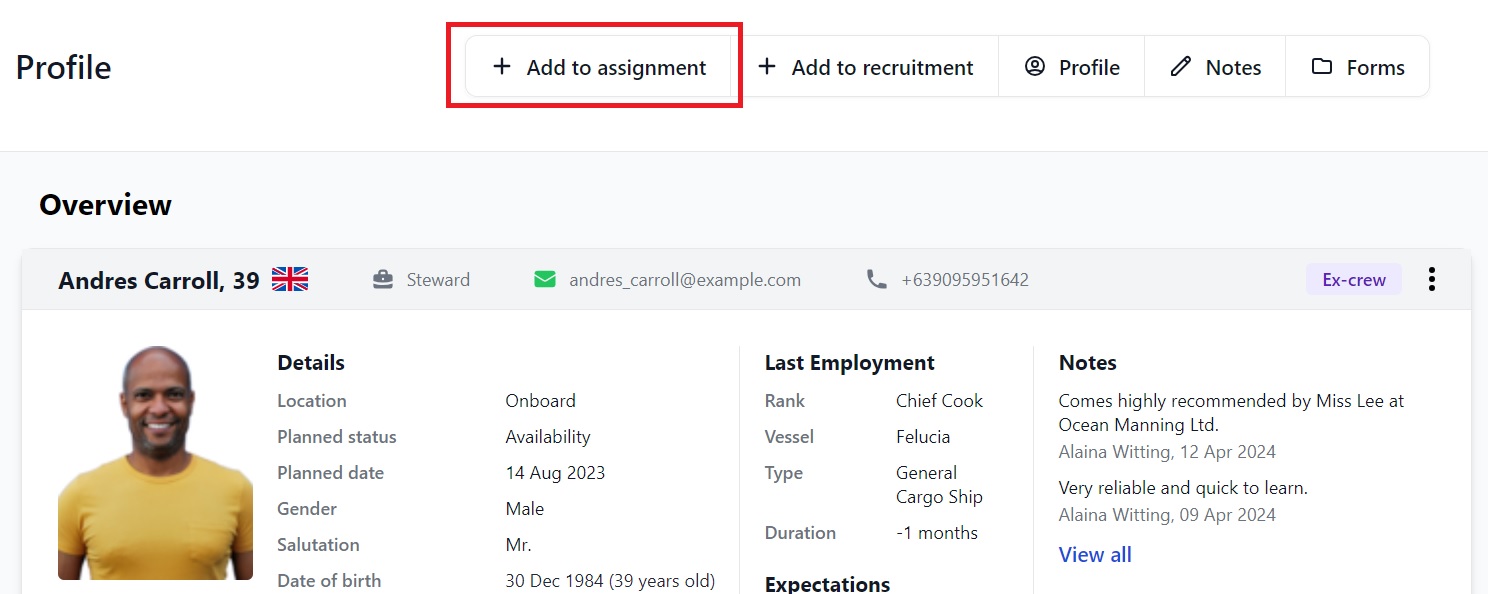
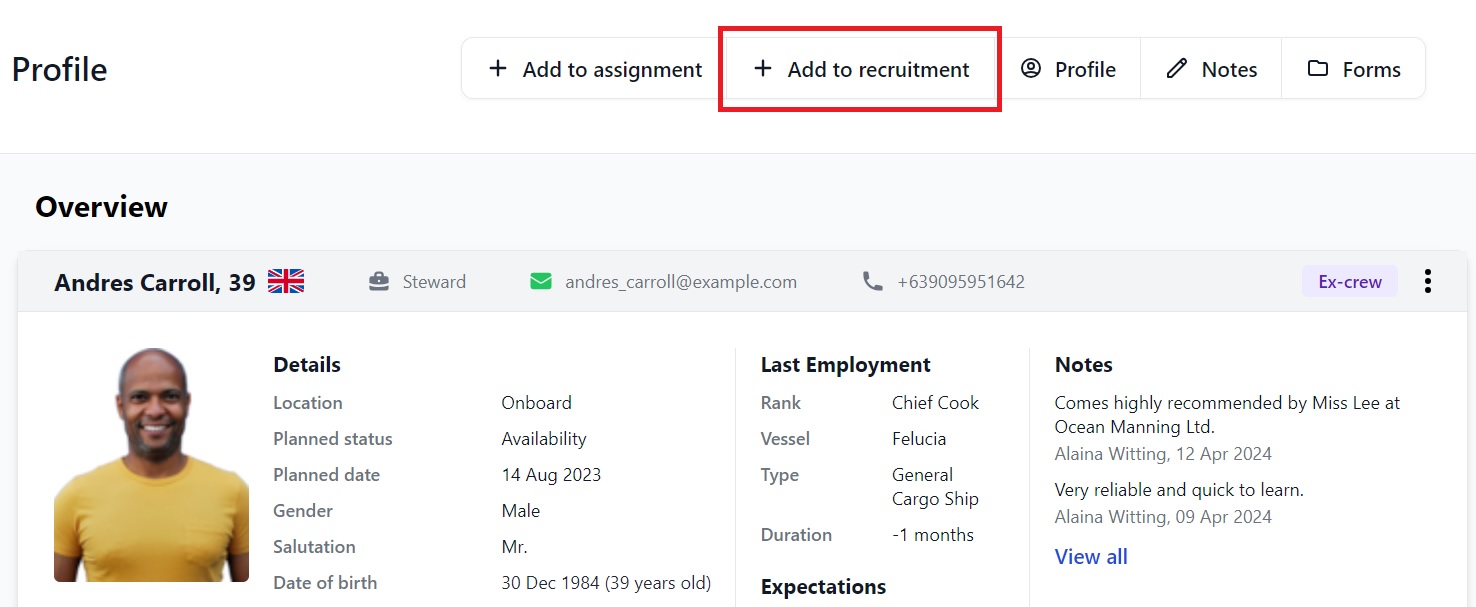
- Add the seafarer to an Assignment or a Recruitment by clicking Add to Assignment or Add to Recruitment.
- View or make notes about the seafarer by clicking the Notes button or the View All link under Notes.
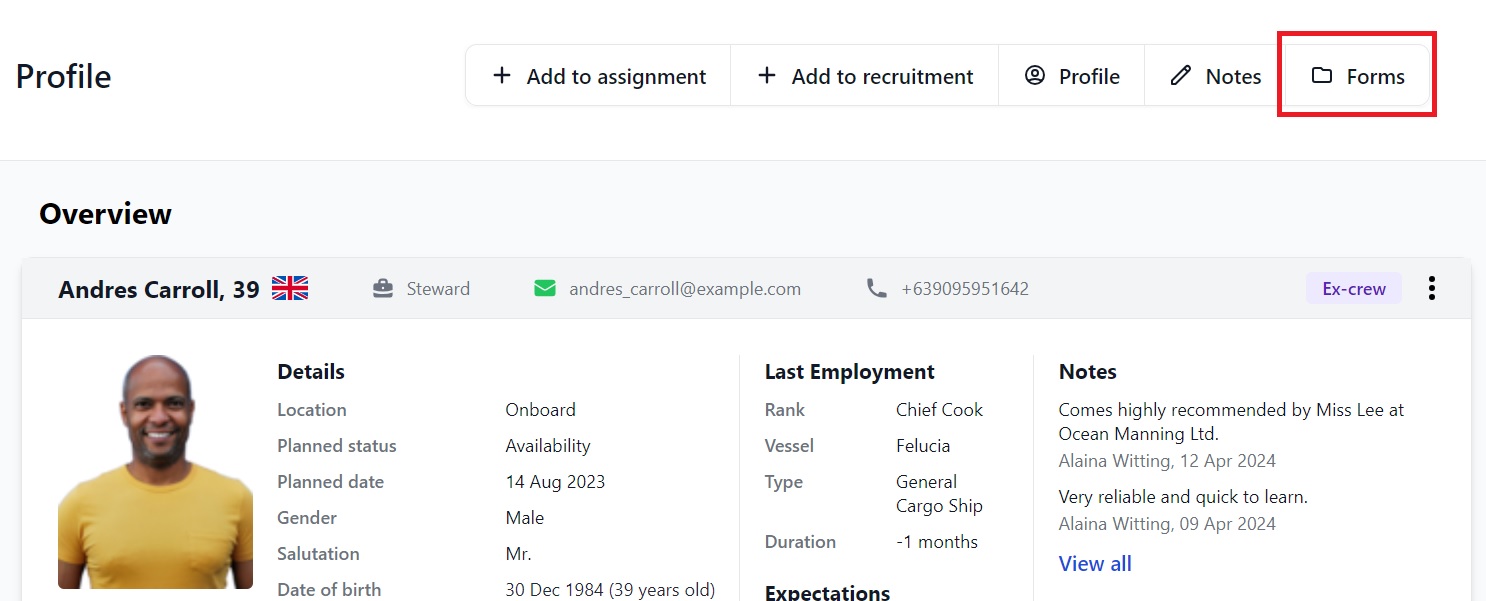
- View and add the seafarer's forms by clicking the Forms button.
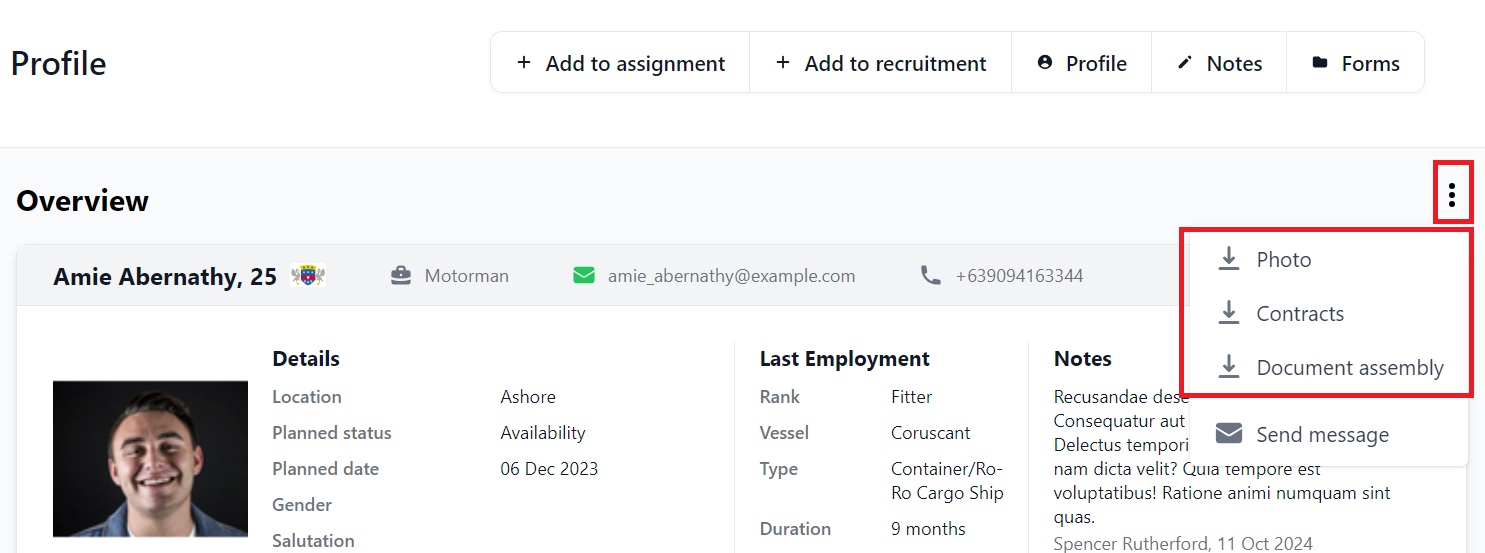
- Download their photo and contracts, add them to a Document Assembly template, or send them a message by clicking the 3 vertical dots.
- Scroll down the page to see all the different sections which include everything from their employment history to their bank details. For a full explanation of the sections in a seafarer's profile, visit this page.
How to add a note about a seafarer
On a seafarer's profile page there is a Notes button and a link to View All under the Notes in the overview:
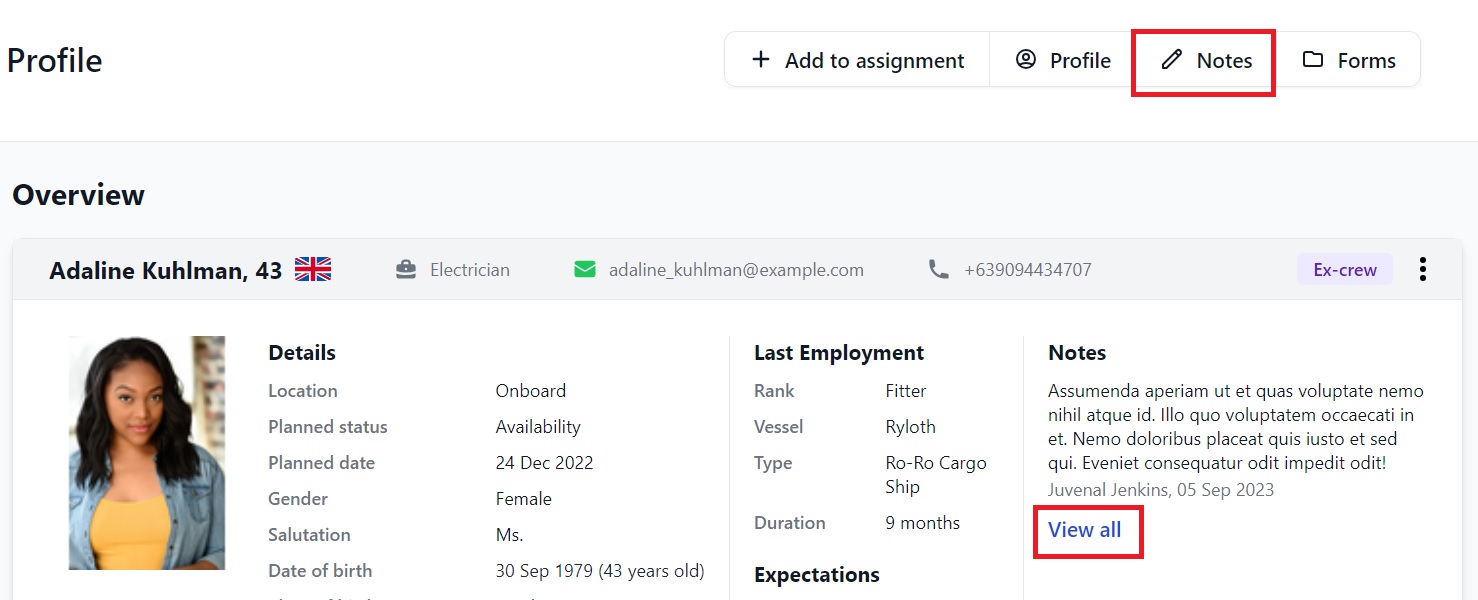
Click either and you will go to this page:
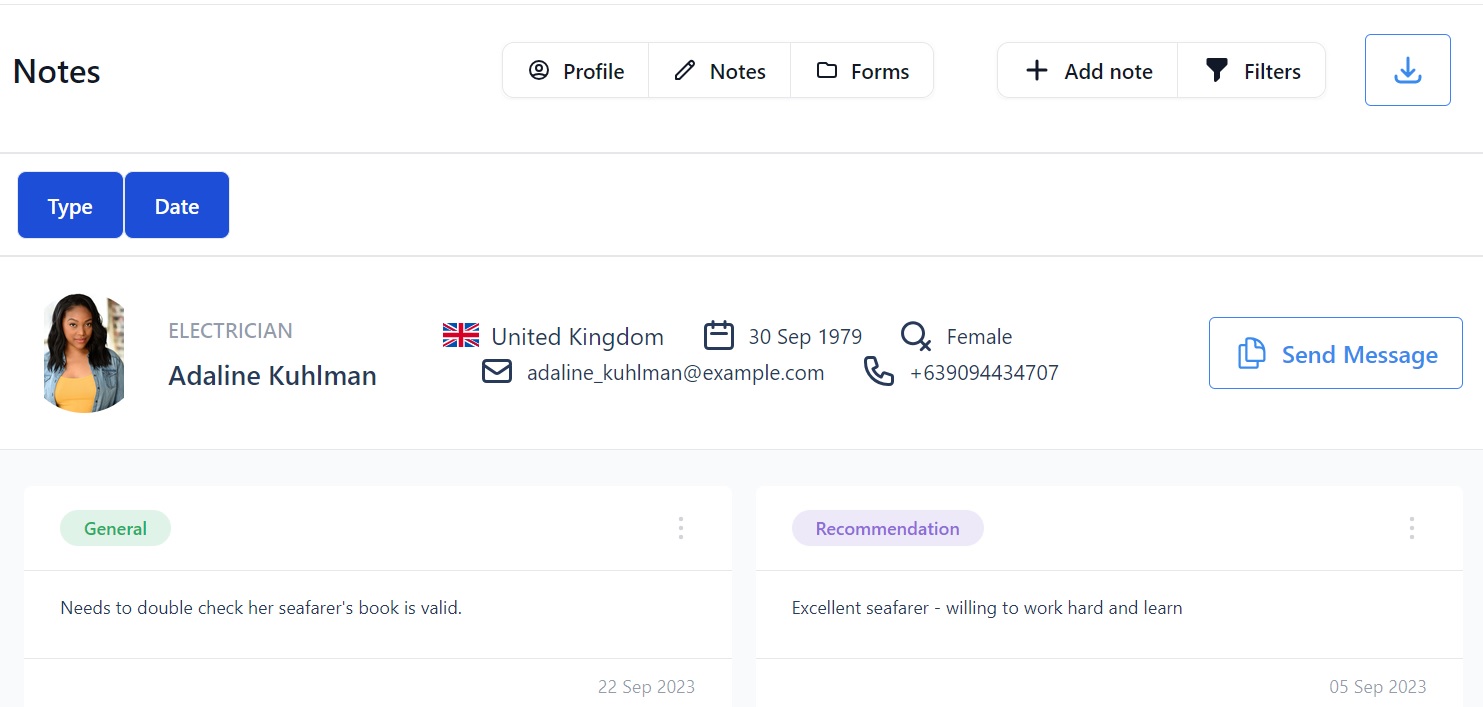
In our example there are two notes about this seafarer.
Here you can:
- See the notes and type of note that have been written about the seafarer.
- Add a new note by clicking the Add note button.
- Filter notes by Type and Date by clicking the buttons above the seafarer's profile picture.
- Download the page as an Excel file by clicking the arrow at the top.
- Send the seafarer a message by clicking the Send Message button.
To add a note click Add Note at the top. That will open this pop-up box:
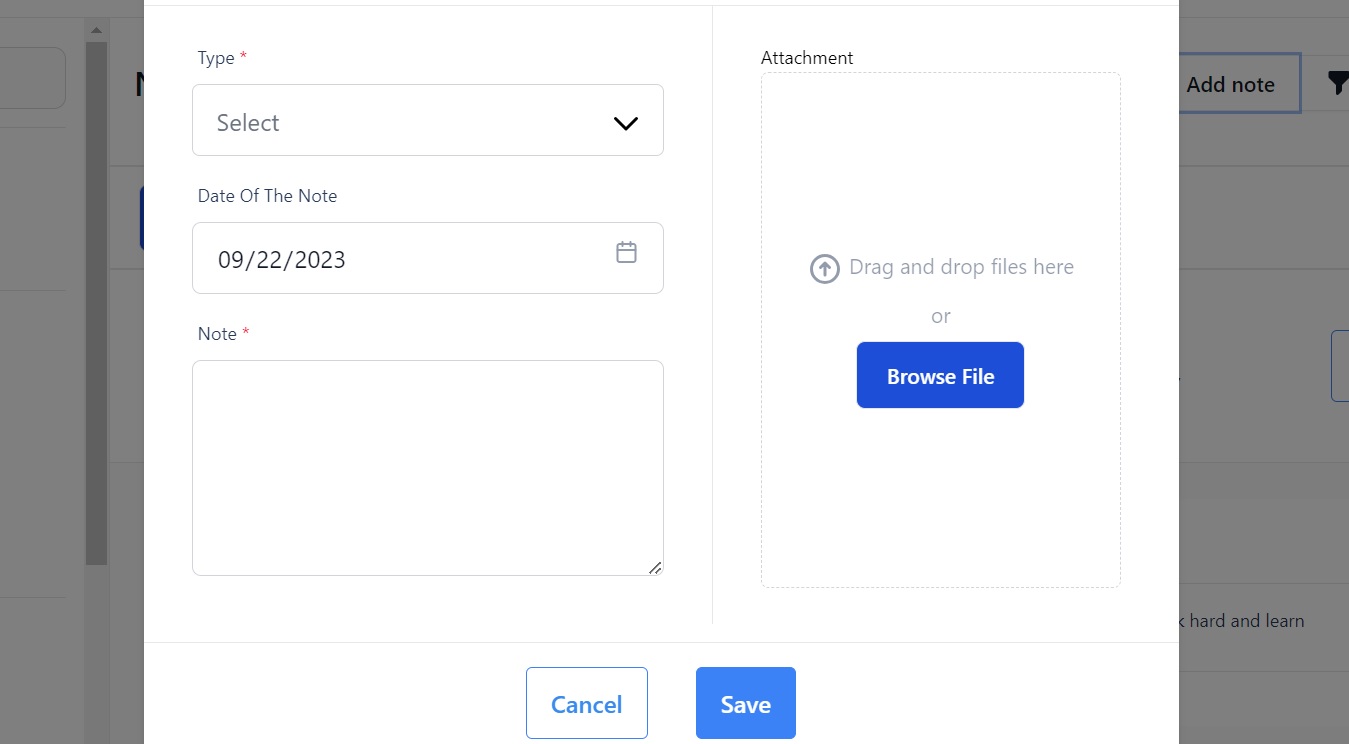
Here you can:
- Select the type of note. (Set your types under Settings > Notes - see our guide here.)
- Type the note into the text box.
- Upload one or more attachments.
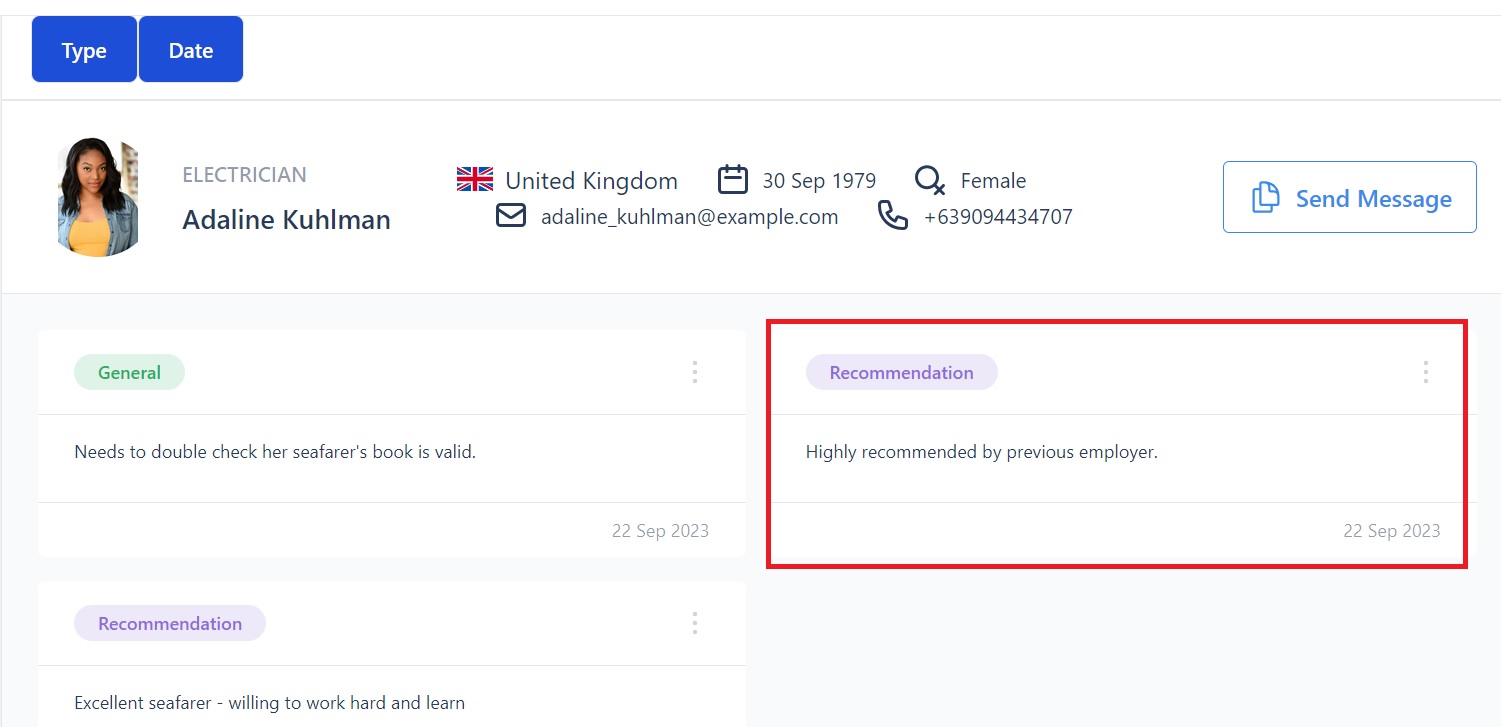
Click Save and your note will show on the seafarer's profile page when you're in the Notes tab as well as on the profile overview:
How to view and add Forms on a seafarer's profile
Click the Forms button at the top of the seafarer's profile:
You will go to this page:
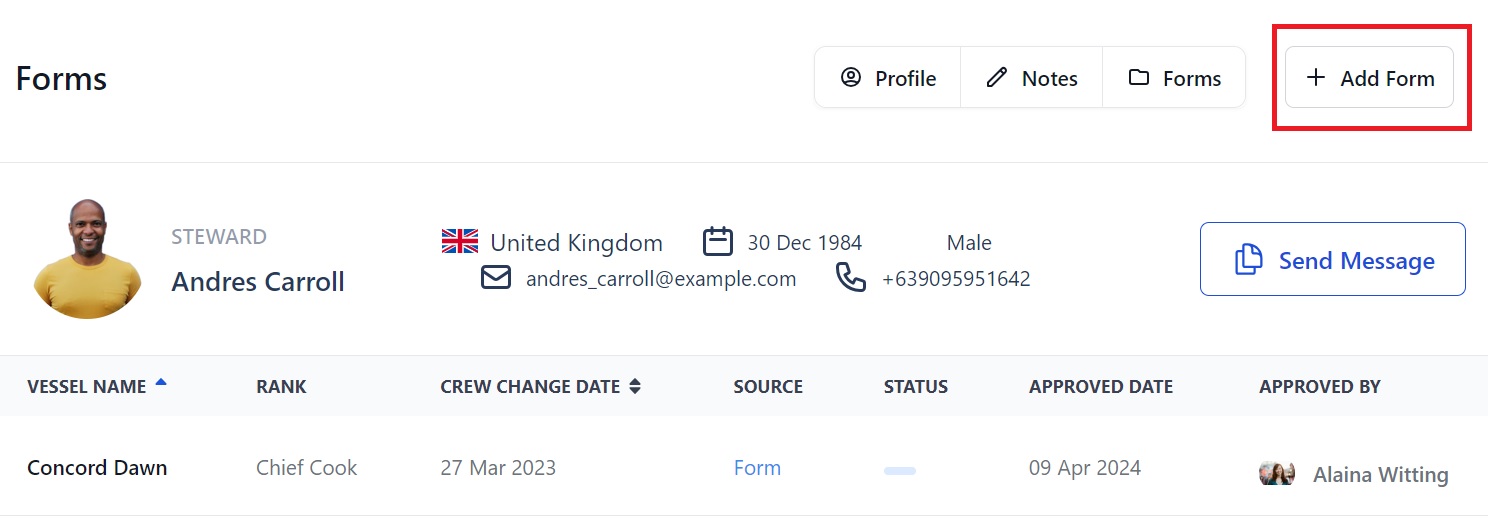
Here you can:
- Click on Form under the heading Source to go to a Form that has been completed by the candidate as they progress through the Recruitment Pipeline.
- Click Add Form to manually add a new Form. That will show you this pop-up box:
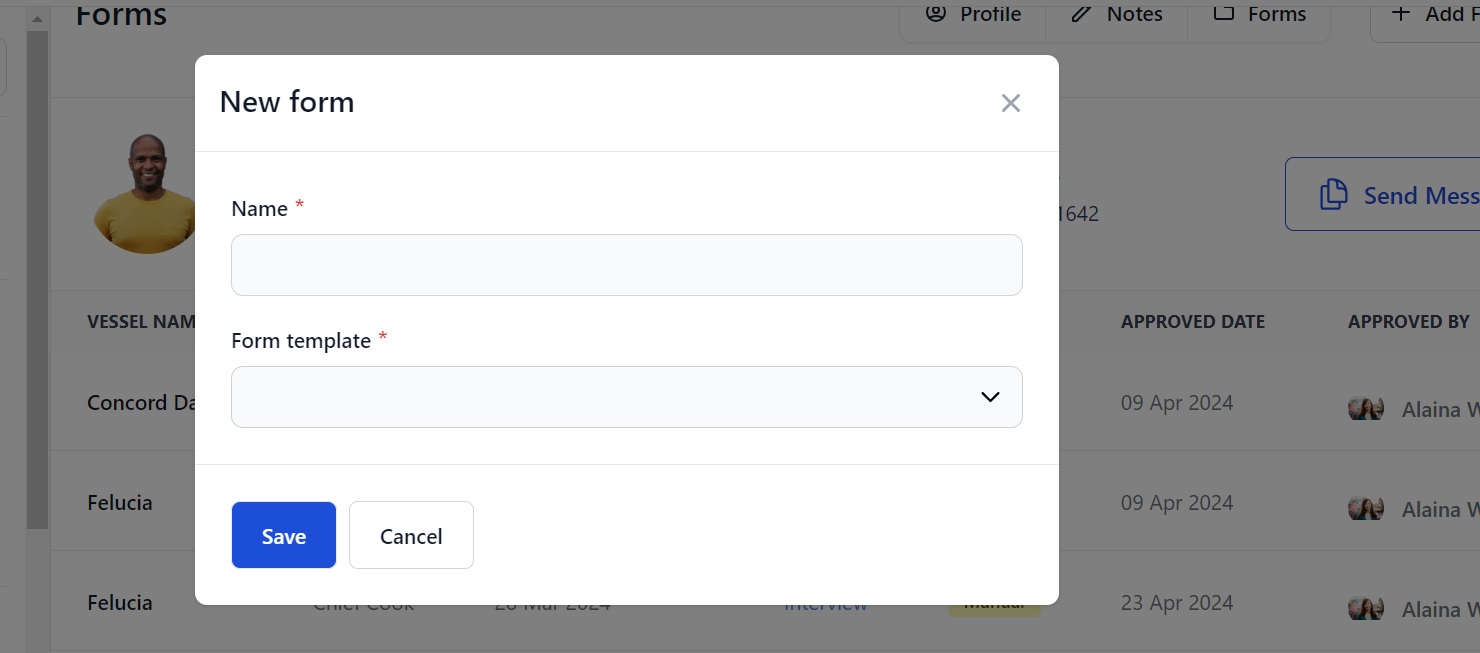
Enter a name and select a Form Template and you will go to the Form that has been saved as that template. For example:
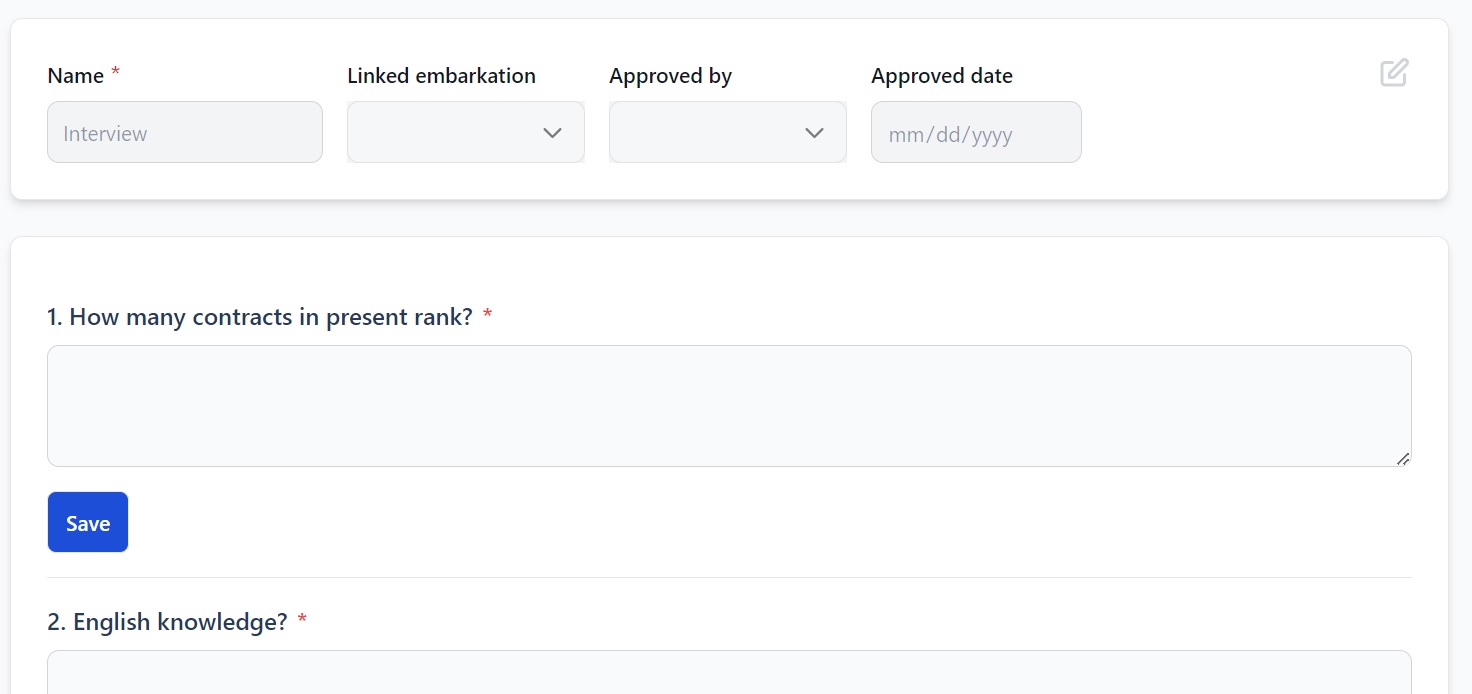
Complete the Form and click Save. The linked embarkation will then show on the seafarer's profile page under the Forms tab.
How to add a seafarer to an Assignment or Recruitment
There are 3 ways to add a seafarer to an Assignment:
- Click Add to assignment at the top of their profile page (img. 1) or
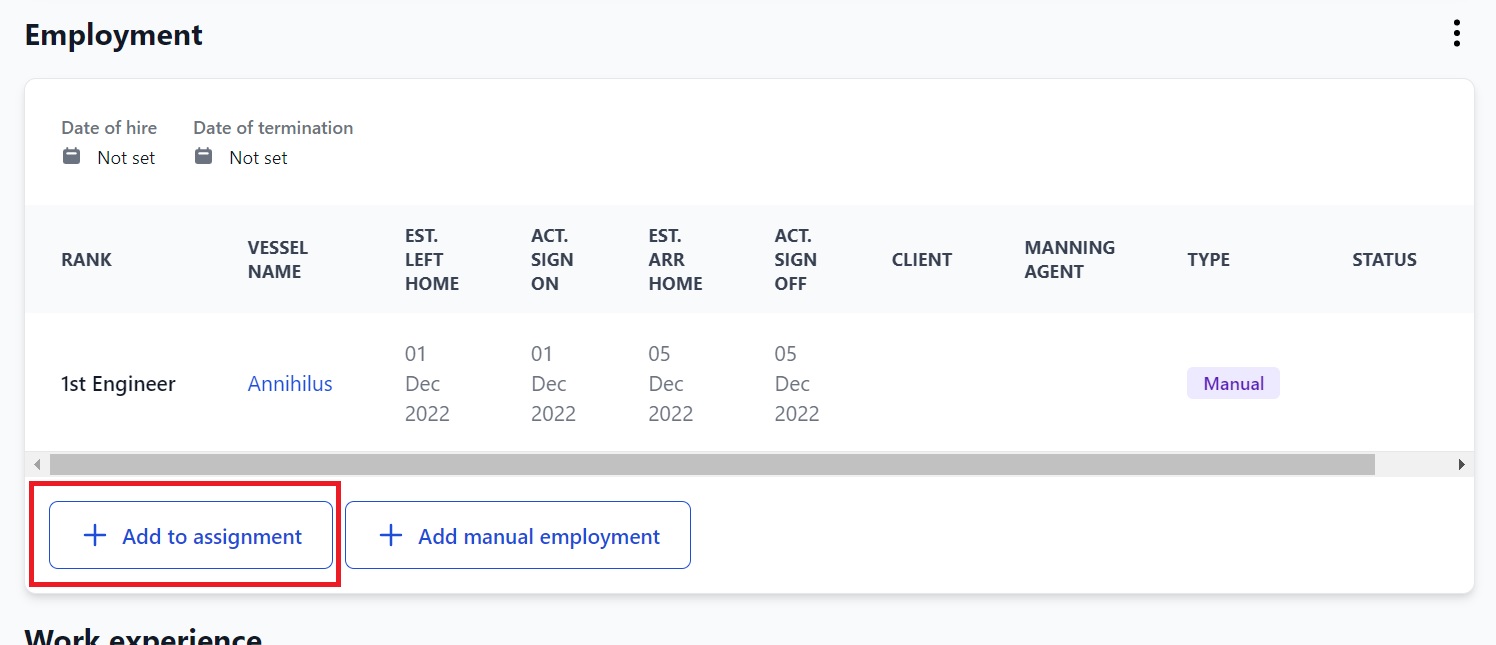
- Click Add to assignment at the bottom of the Employment section in their profile (img. 2) or
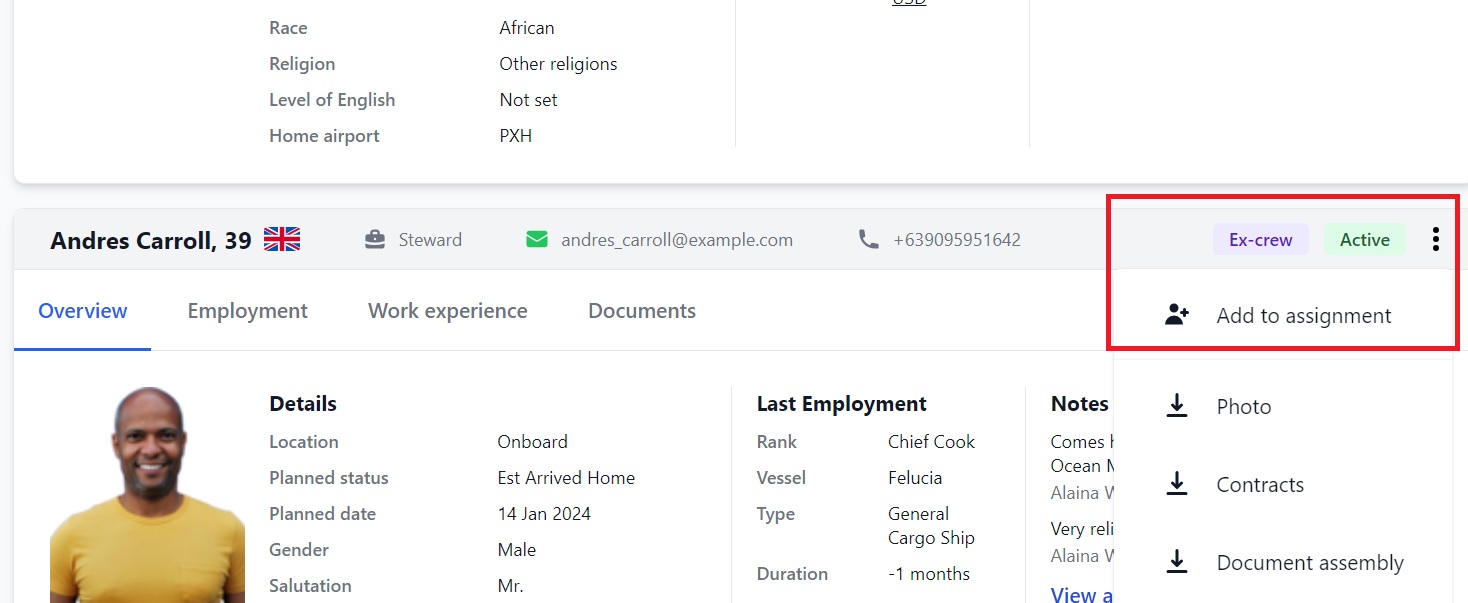
- Click the 3 vertical dots in their overview on the Seafarers page and click Add to assignment in the drop down menu (img. 3)
or:
Or:
All methods take you to this pop-up box:
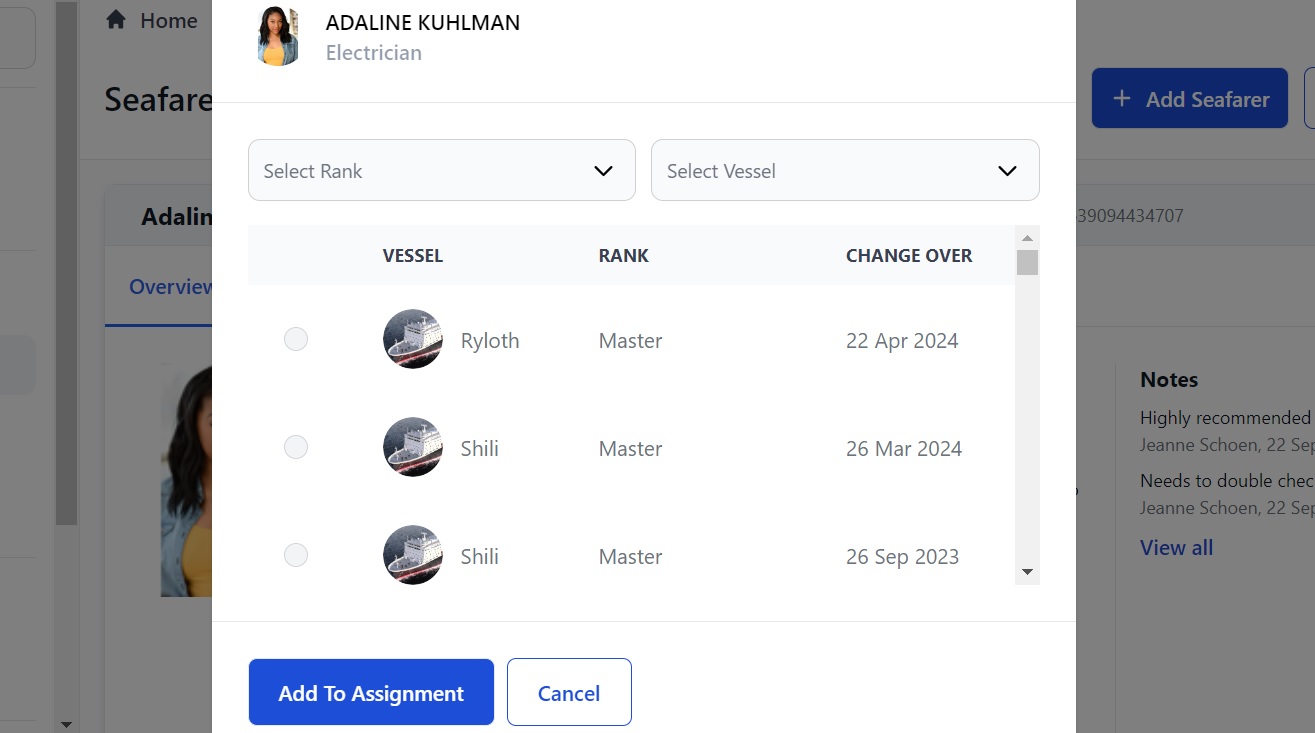
Here you can:
- Use the drop down boxes at the top to find the rank and vessel you want to add the seafarer to.
- Click the circle next to the vessel, rank and date you want to apply the seafarer to then click Add to assignment.
Adding a seafarer to a Recruitment is exactly the same but there is only one way to do so and that is by clicking Add to Recruitment at the top of their profile page:
How to create a manual contract & add an extension
Note: this feature is for crew managers only.
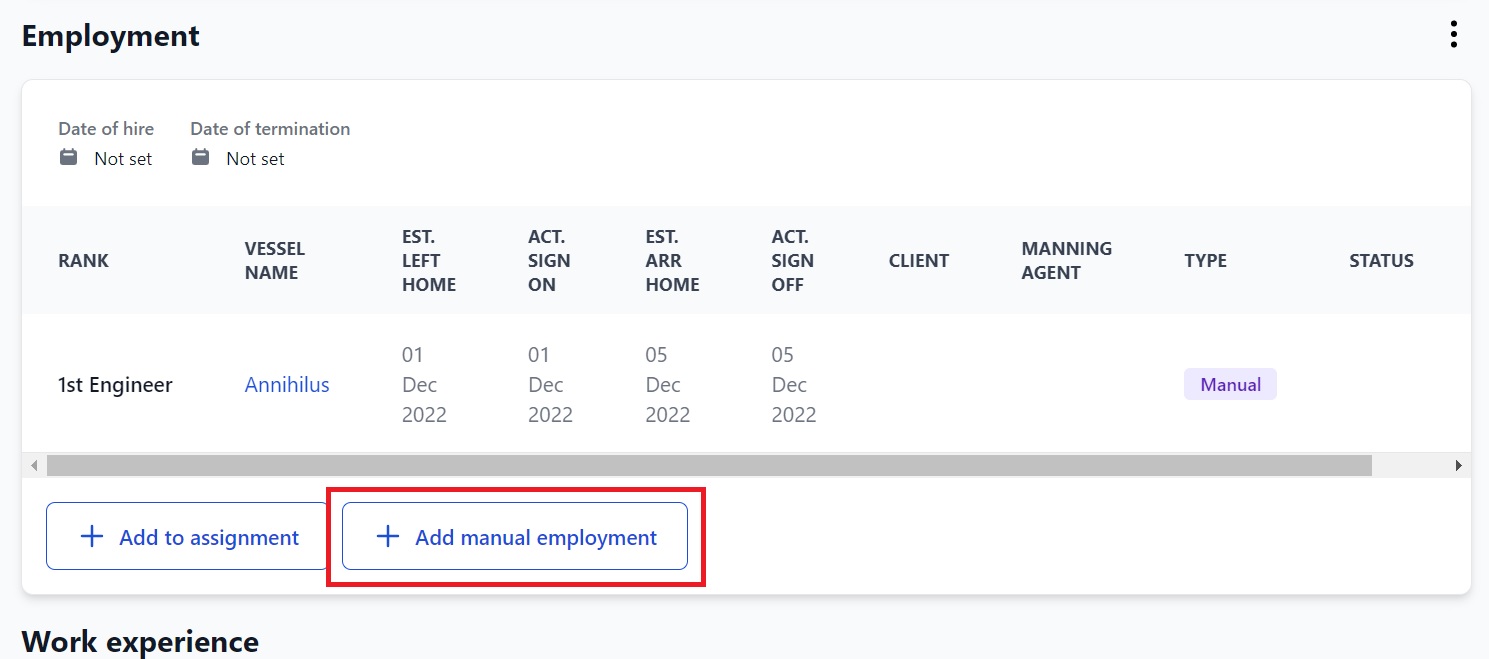
Click Add Manual Employment at the bottom of the Employment section in a seafarer's profile:
That will open this pop-up box:
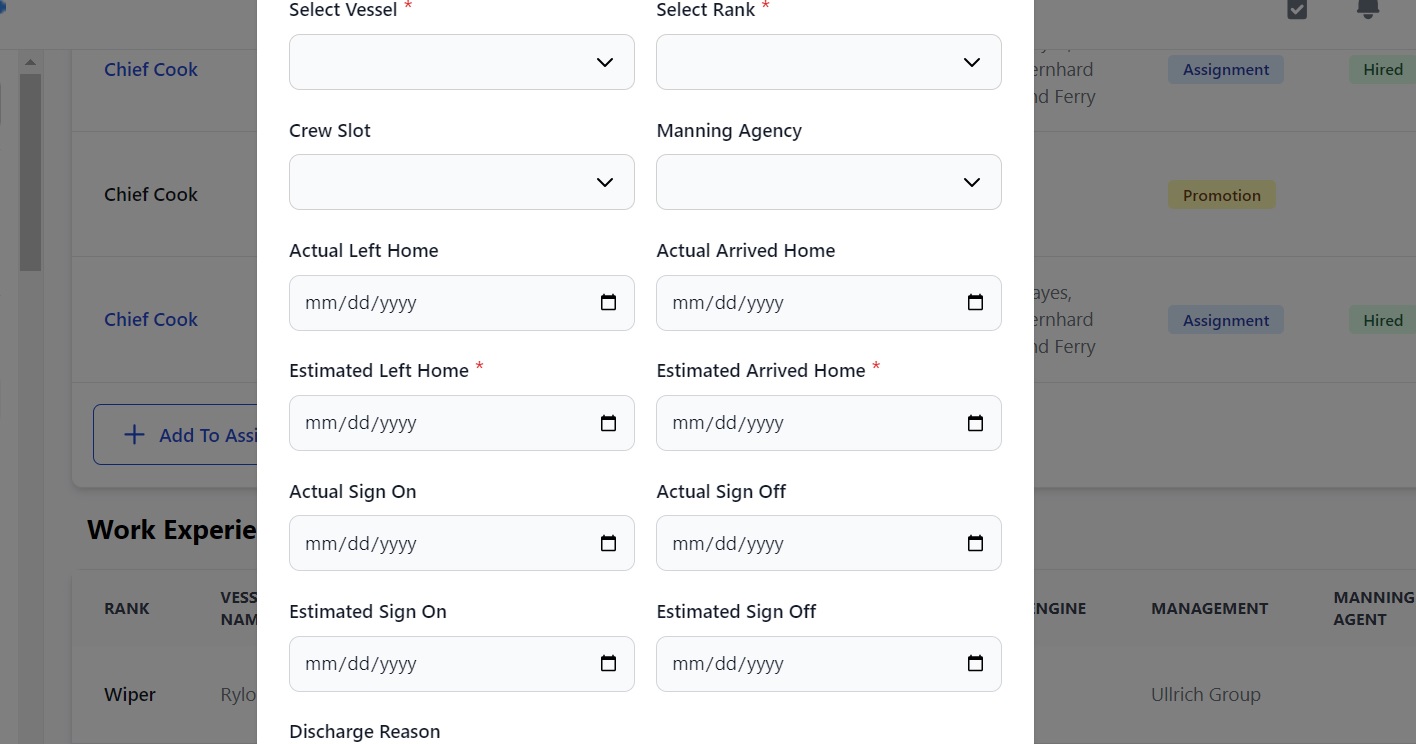
Here you can:
- Select the Rank, Vessel, Crew Slot and Manning Agency.
- Enter the Actual and Estimated Left Home and Arrived Home dates.
- Enter the Actual and Estimated Sign On and Sign Off dates.
- Select the Discharge Reason.
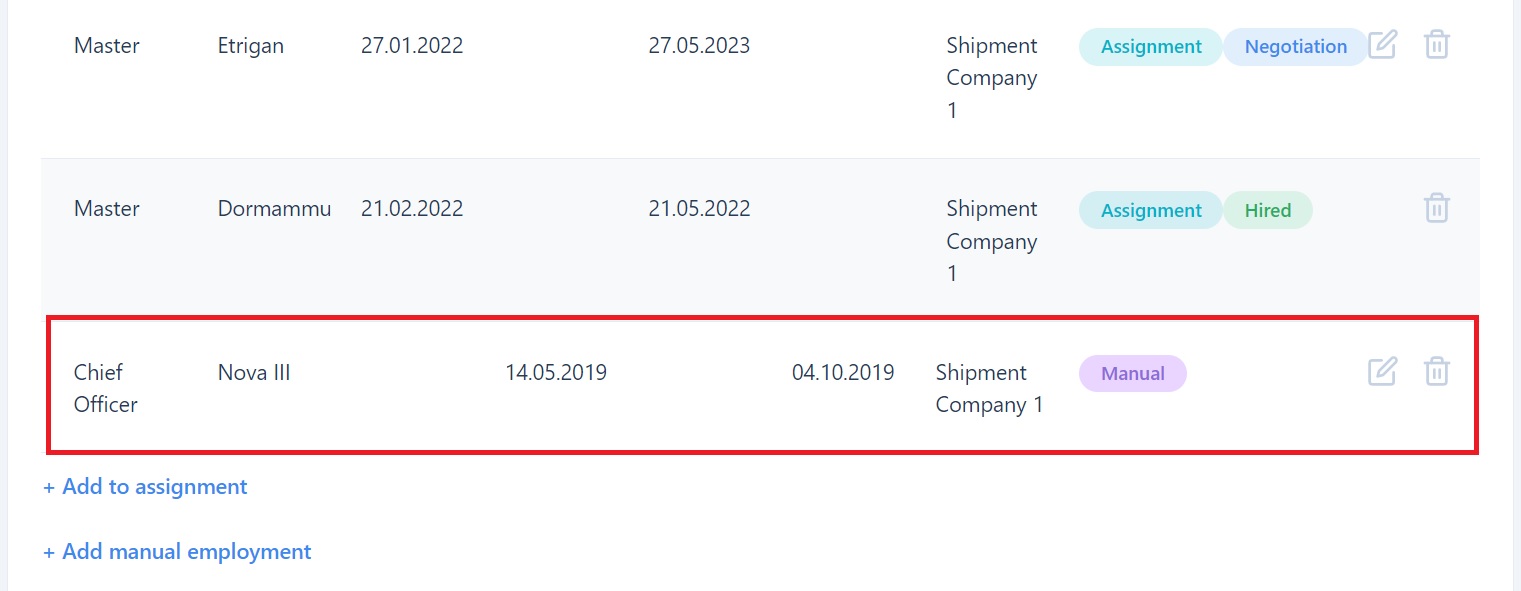
Click Save and the manual employment will show in the Employment section:
How to extend a manual contract
Go to the Employment Contracts section further down the page:

Click Add Contract to fill in the details and upload the contract of the manual employment you want to extend.
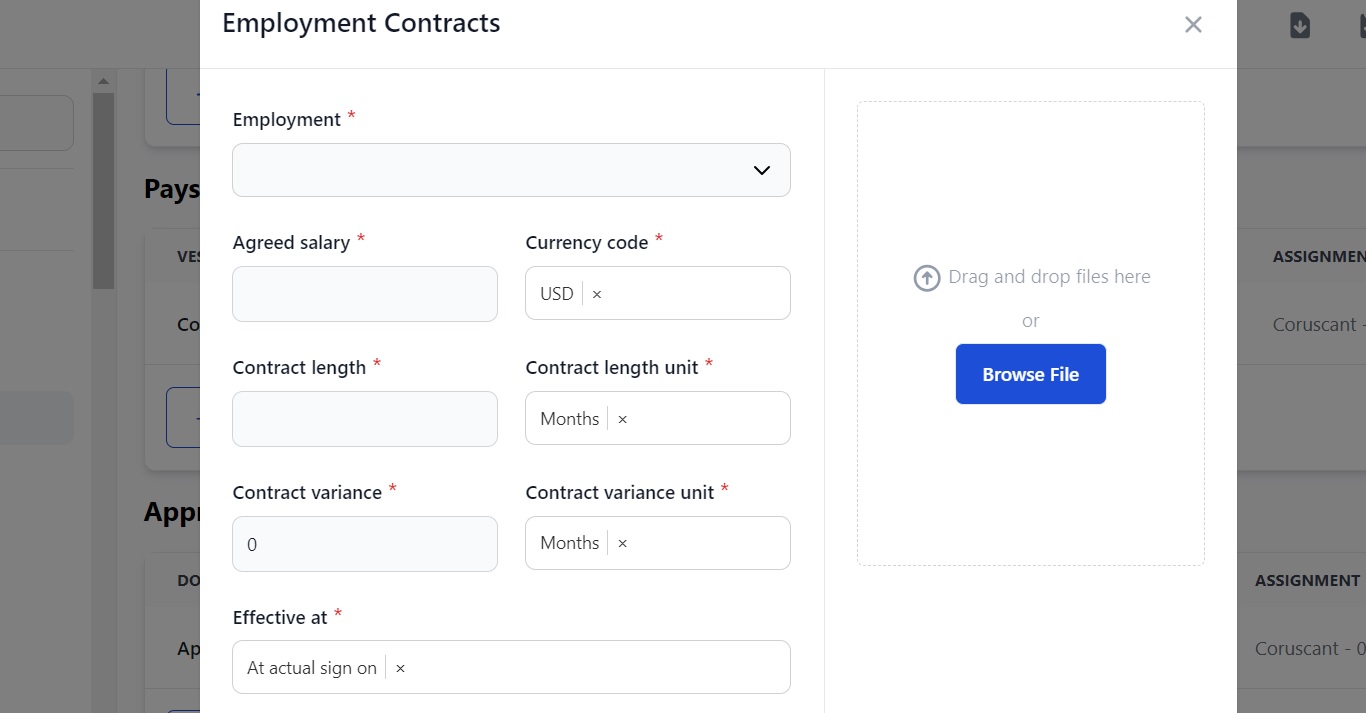
Click Save. The contract will show on the main page and you can click Add Extension.

You will see this pop-up box:
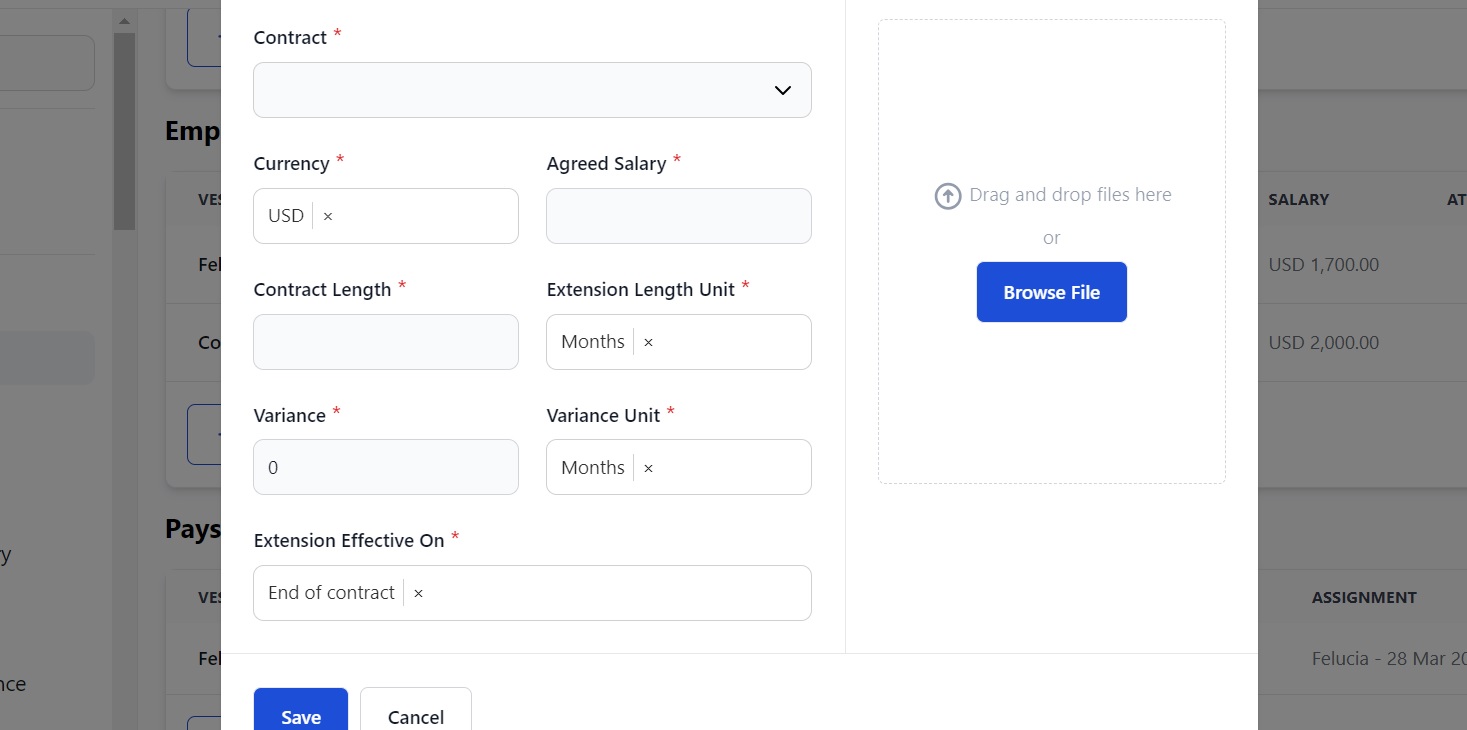
Fill in the details and upload the amended contract. Click Save and the extension will show in the Employment Contracts section with its Type listed as Extension.
How to filter and search for seafarers
Click the funnel icon at the top of the Seafarers page:

This opens a side panel of filters. Click the down arrows to search by various information:
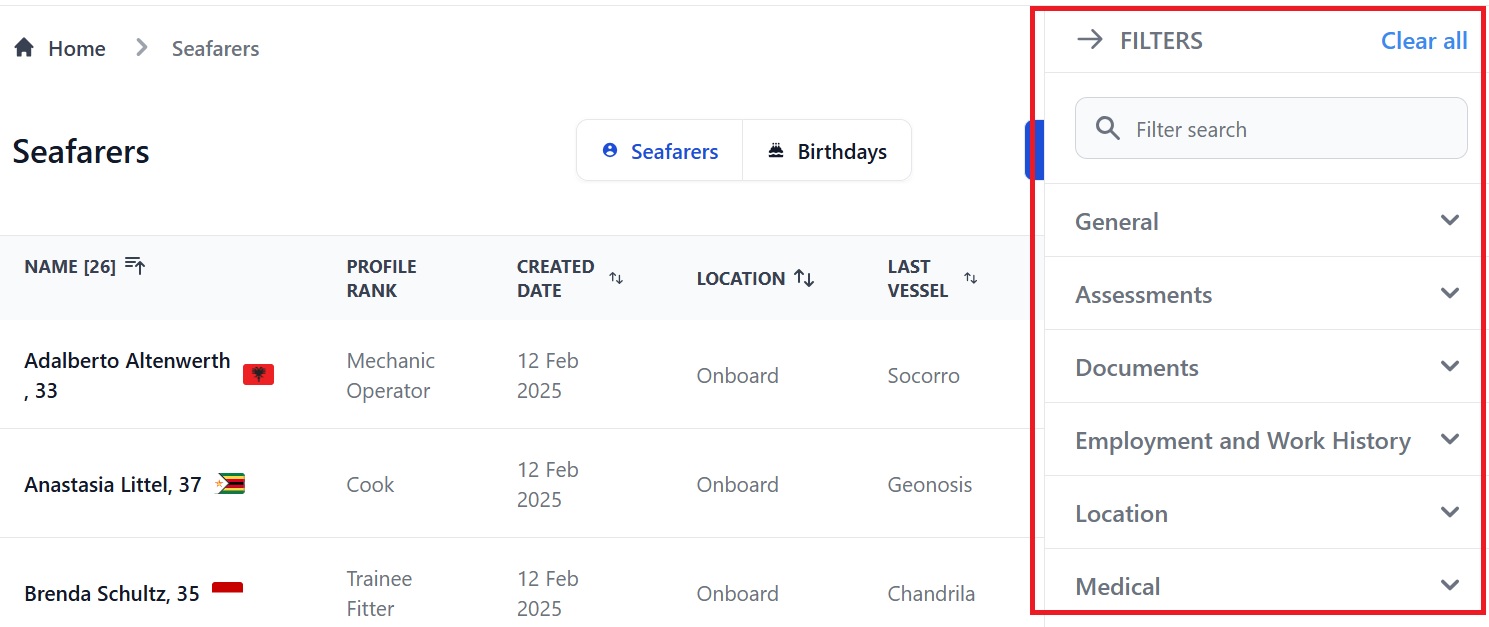
Tip: If you have filters you use a lot (e.g. vessel or rank), set your search terms and save the results in your browser's bookmarks. When you open the bookmark, you'll get the search results for the filter you saved.
How to download seafarer information
There are 3 ways to download information:
- Click the 3 dots at the top of the Seafarers page (image 1.)
- Click the 3 dots at the top of a seafarer's overview (image 2.)
- Click the 3 dots at the top of a seafarer's profile page (image 3.)

Or:
Or:
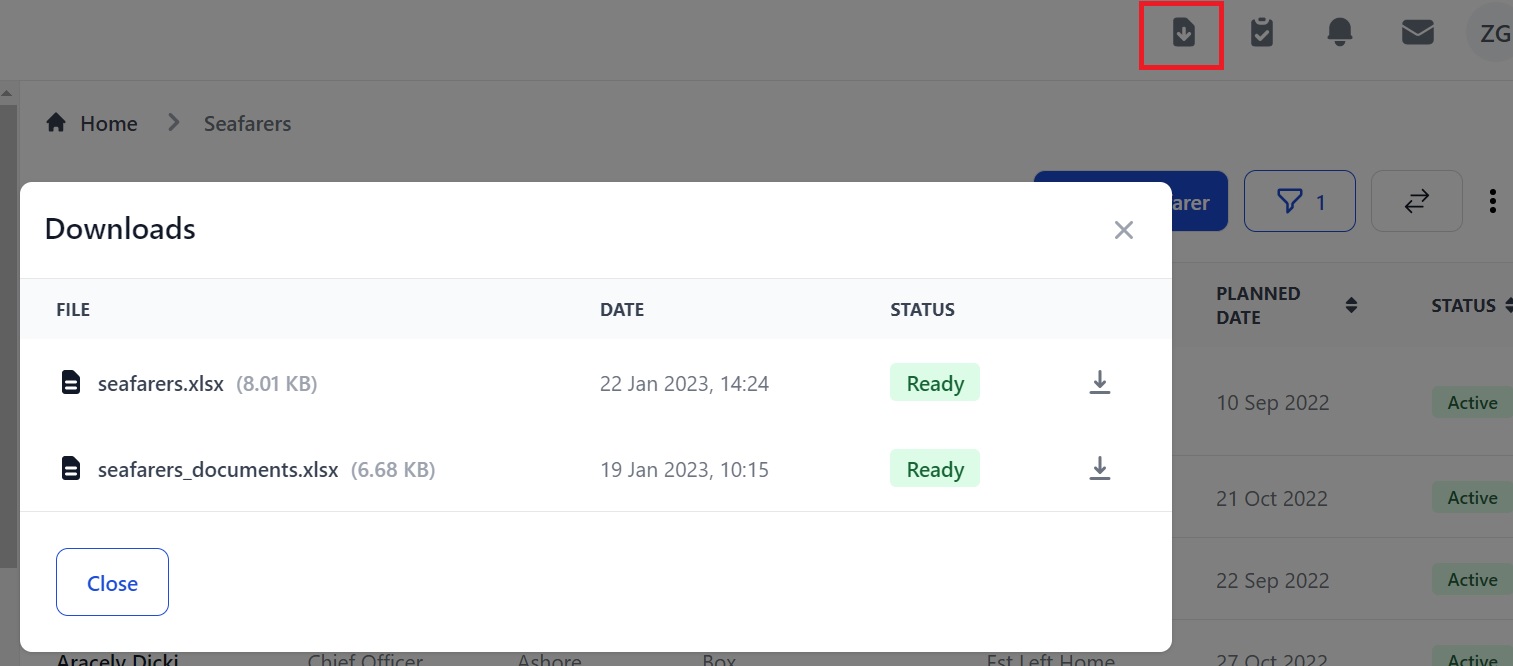
You can also see what you've downloaded by clicking the download icon at the top of the Seafarers page in either list or overview view:
Why can't I find a seafarer whose profile is in the system?
1) Check both the Candidates and Seafarers pages. 2) Remove the default status filter which is set to Active on the Seafarers page. If you still cannot find the seafarer, contact Martide support.
If you need any other help please get in touch with us here.