Pipelines
What is a Pipeline?
For every Recruitment or Assignment you create you need to also create a Pipeline.
- Your Pipeline is made up of steps that tell you what to do next in the process.
- You can add as many or as few steps to your Pipeline as you need.
To create a Pipeline, log into your Martide account. Click Settings in the menu under your profile picture and then Pipelines.

You will go to the Pipelines page:
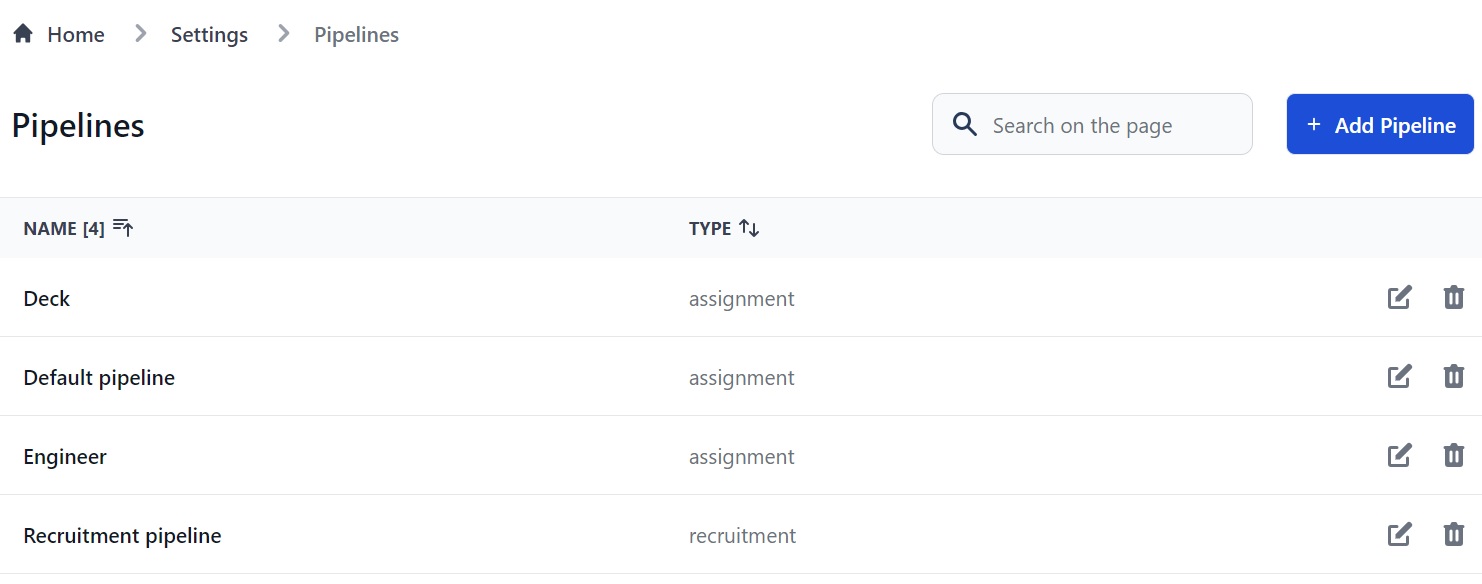
Here you can:
- Look for an existing Pipeline in the Search box.
- Create a new Pipeline.
- Edit or Delete existing Pipelines.
- Sort Pipelines alphabetically or numerically by clicking the arrows next to Name and Type.
How to create a new Pipeline
Click the Add Pipeline button (see image above.)
You will go to this page:
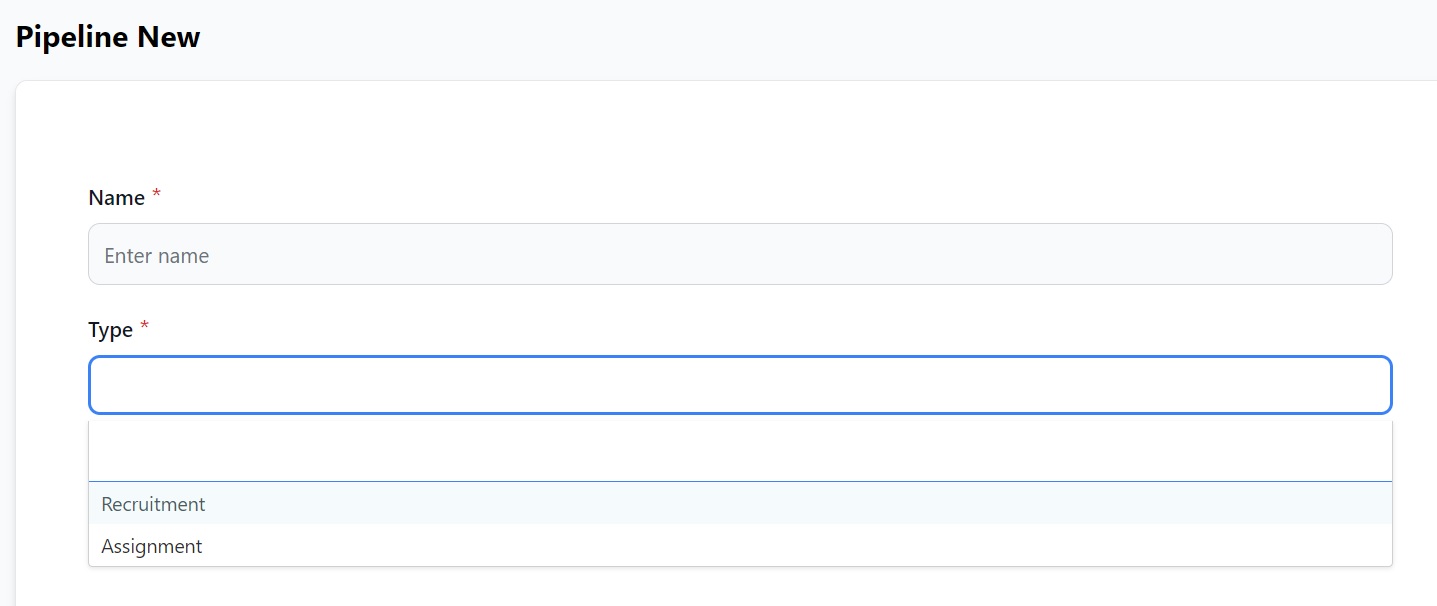
Name your Pipeline - e.g. 2nd Engineer. If you are a Crew Manager you must select a type: Recruitment or Assignment.
- Recruitments let you add candidates to the database so you can hire them in the future.
- Assignments are for hiring a seafarer for a specific vessel, date and contract.
Click Save and you'll go to a page where you can set the stages you want to include in your Pipeline. The page is slightly different depending whether you choose Recruitment or Assignment. We'll go through both.
How to set Stages for an Assignment Pipeline
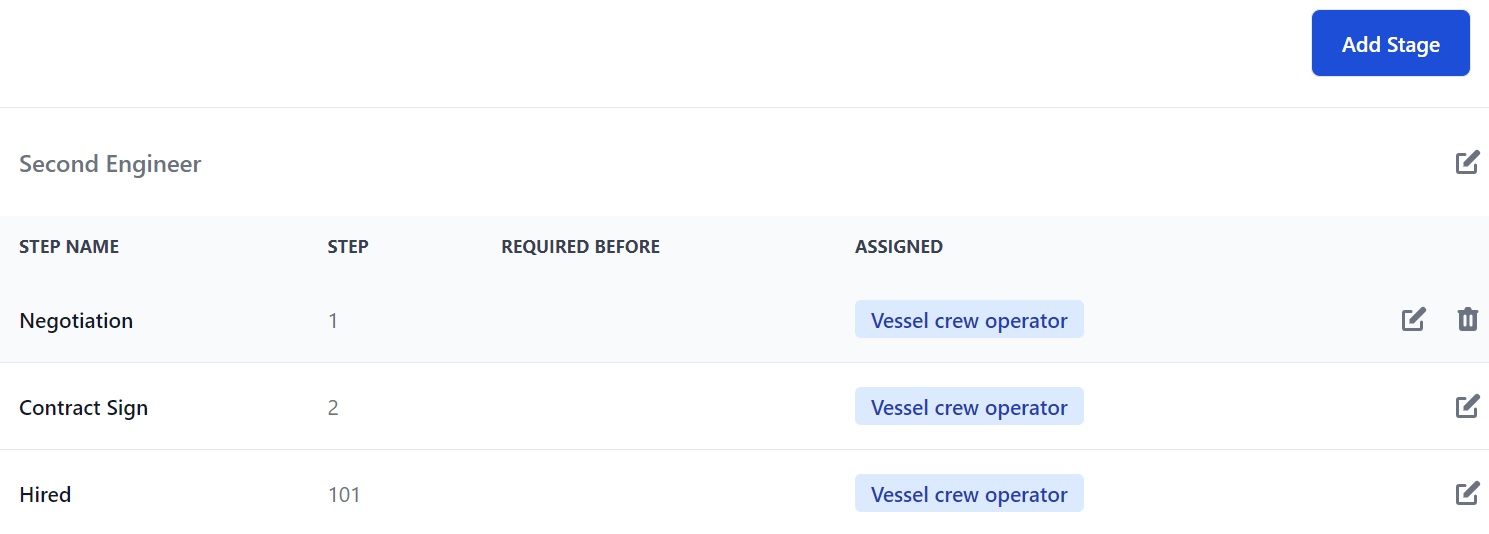
(If you are a manning agent, you can skip this and go to How to set Stages for a Recruitment Pipeline.)
There are 3 default Stages: Negotiation, Contract Sign and Hired. You can delete Negotiation by clicking the trash can. You can't delete Contract Sign or Hired.
Also on this page you can:
- Edit the Pipeline's name by clicking the pen icon next to the name.
- See each Stage, which step in the Pipeline it is and if it is required before another Stage in the Pipeline.
- See who a Stage is assigned to.
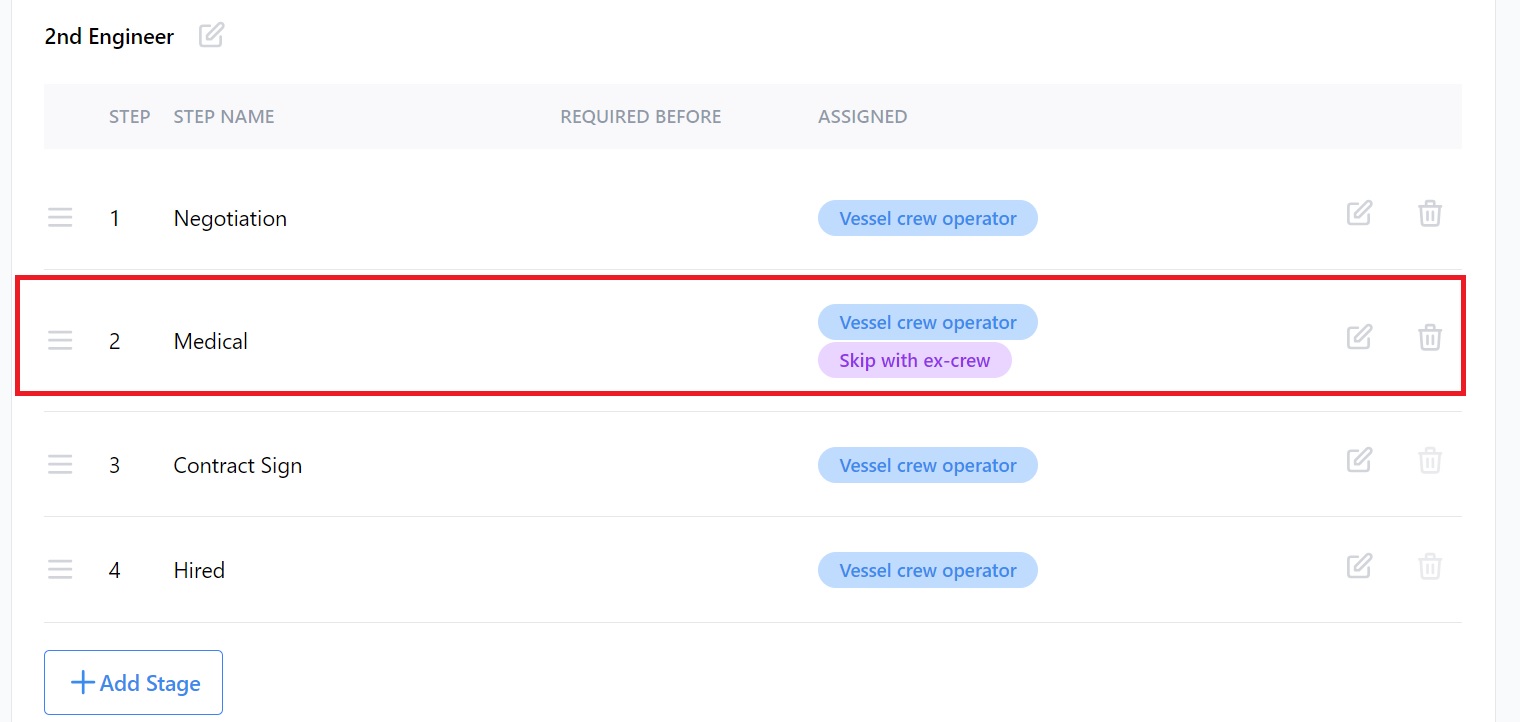
- Edit the Stage by clicking the pen icon. You can change the display name, who it's assigned to, the order it appears in the Pipeline, and if you want to skip the Stage with ex-crew.
- Add new Stages to the Pipeline by clicking the Add Stage button.
How to add a new Stage to an Assignment Pipeline
To add a new Stage to an Assignment Pipeline click the Add Stage button. You will see this pop-up box:
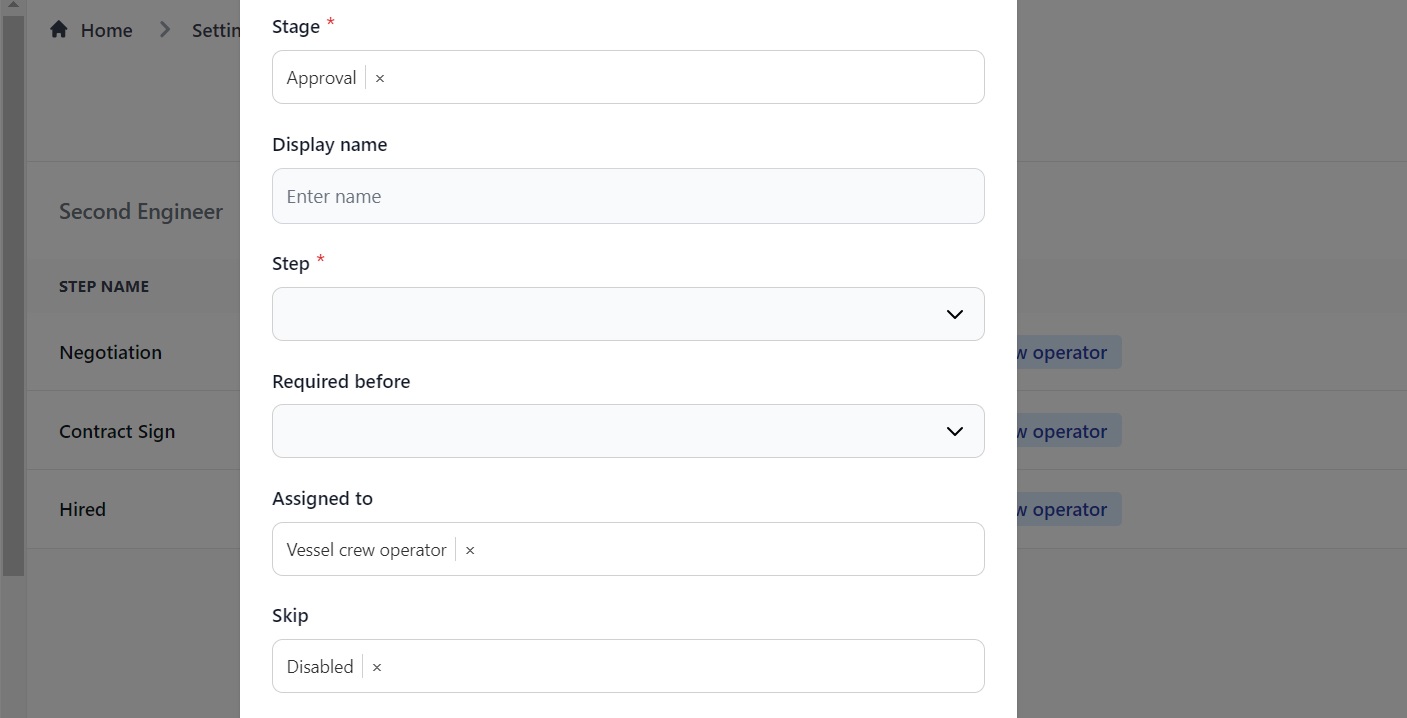
Here you can:
- Select a Stage from the Stage drop down box.
- Enter an alternative display name for the Stage (optional).
- Select the Step this Stage should appear in your hiring process.
- Select Required Before if you want this Stage to be completed before another Stage (more about this below.)
- Select who you want to assign this Stage to from the drop down box.
- Choose whether you want ex-crew or ex-crew with identical Assignment ranks to be able to skip this Stage in the drop down menu.
Back on the Stages page you will now see your new stage. For example:
How to set Stages for a Recruitment Pipeline
Manning Agents will also use this process.
We will create a Recruitment Pipeline for a Fitter. Click the Add Pipeline button at the top of the main Pipelines page.
You'll see this if you're a Crew Manager. If you're a Manning Agent you'll just see the name box:
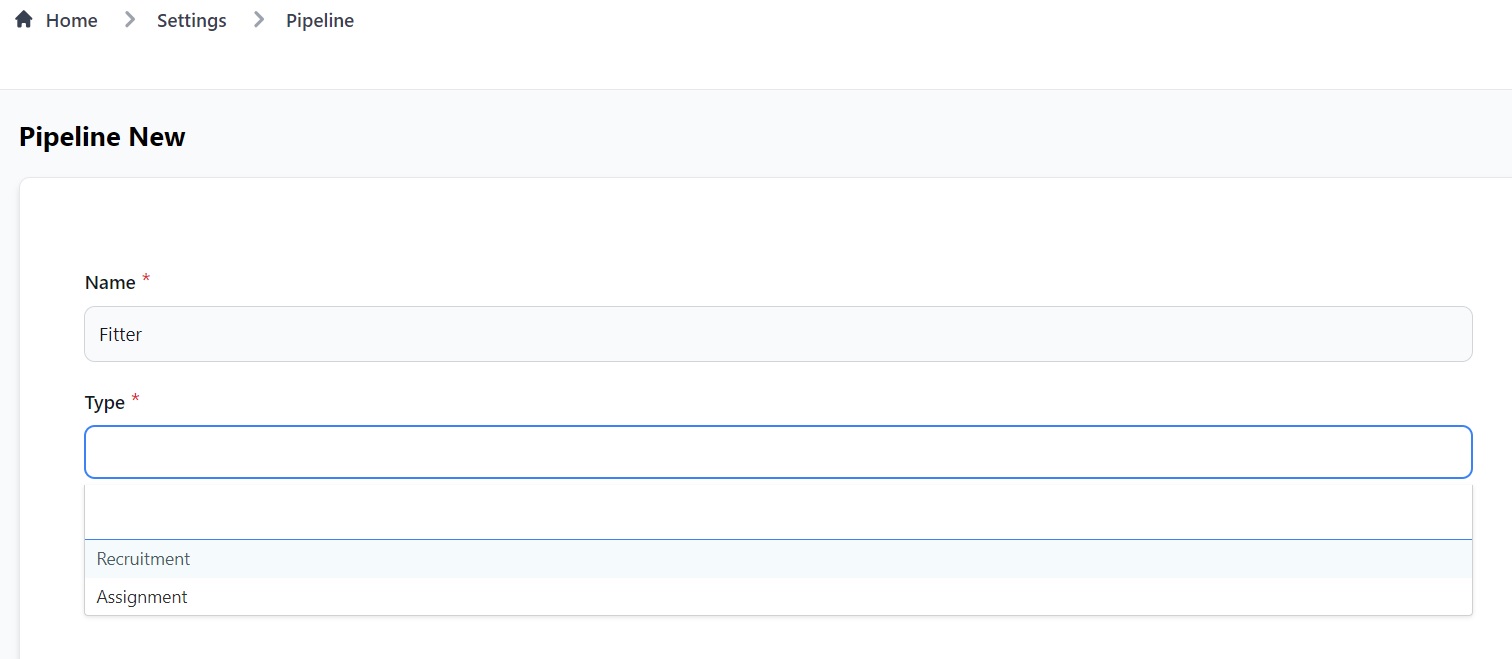
Name your Pipeline - in our case Fitter and select Recruitment. Click Save and you'll see this:
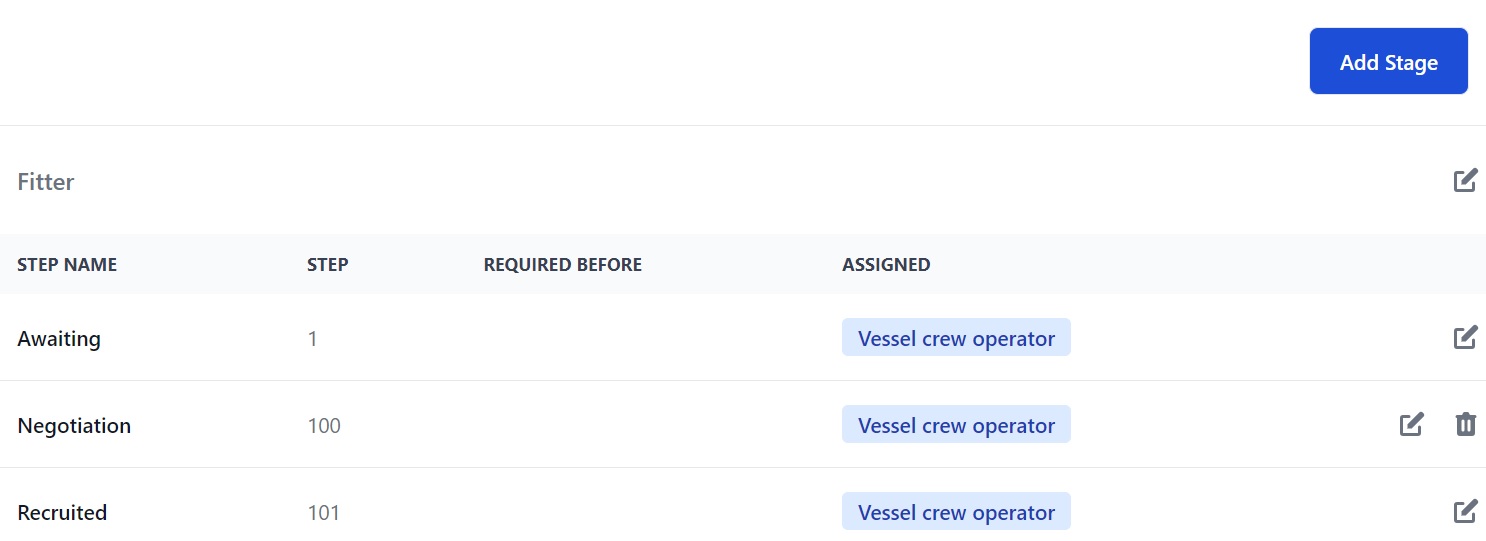
There are 3 default Stages: Awaiting, Negotiation and Recruited. You can edit Awaiting and Recruited, and you can edit or delete Negotiation.
Also on this page you can:
- Edit the Pipeline's name by clicking the pen icon next to the name.
- See each Stage, which step in the Pipeline it is and if it is required before another Stage in the Pipeline.
- See who the Stage is assigned to.
- Edit some Stages by clicking the pen. You can change the display name, who it's assigned to and the order it appears in the Pipeline.
- Add new Stages to the Pipeline by clicking the Add Stage button.
How to add a new Stage to a Recruitment Pipeline
To add a new Stage to a Recruitment Pipeline click the Add Stage button. You will see this pop-up box:
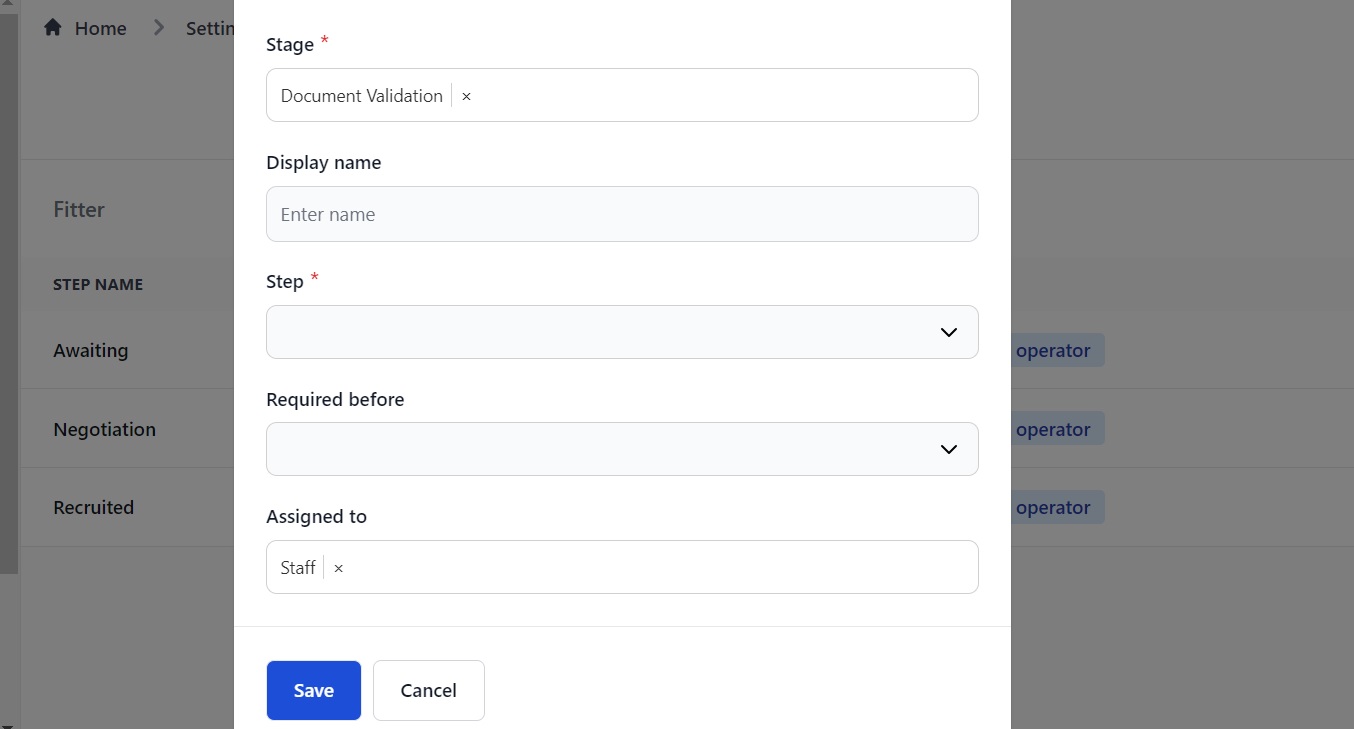
Here you can:
- Select a Stage from the Stage drop down box.
- Enter a display for the Stage (optional).
- Select the Step this Stage should appear in your recruitment process.
- Select Required Before if you want this Stage to be completed before another Stage (more about this below.)
- Select the User or User Group you want to assign this Stage to.
Back on the Stages page you will now see your new Stage. For example:
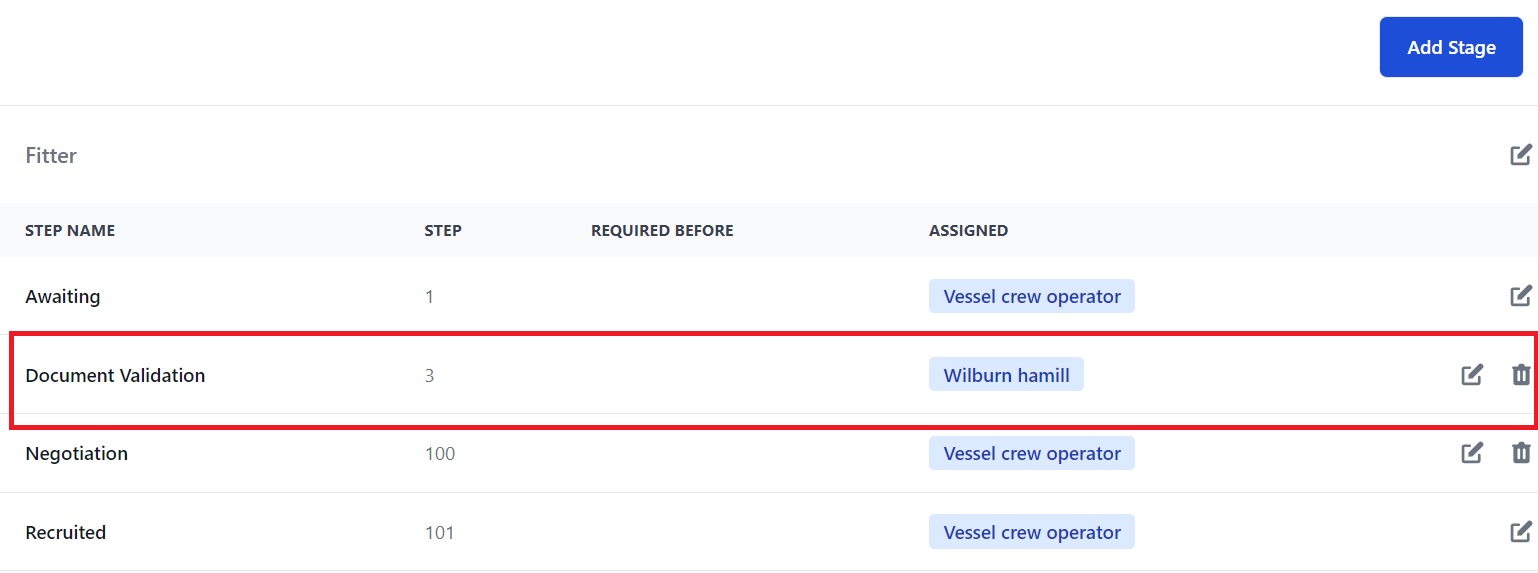
How to set Steps
You must select a Step although Required Before is optional:
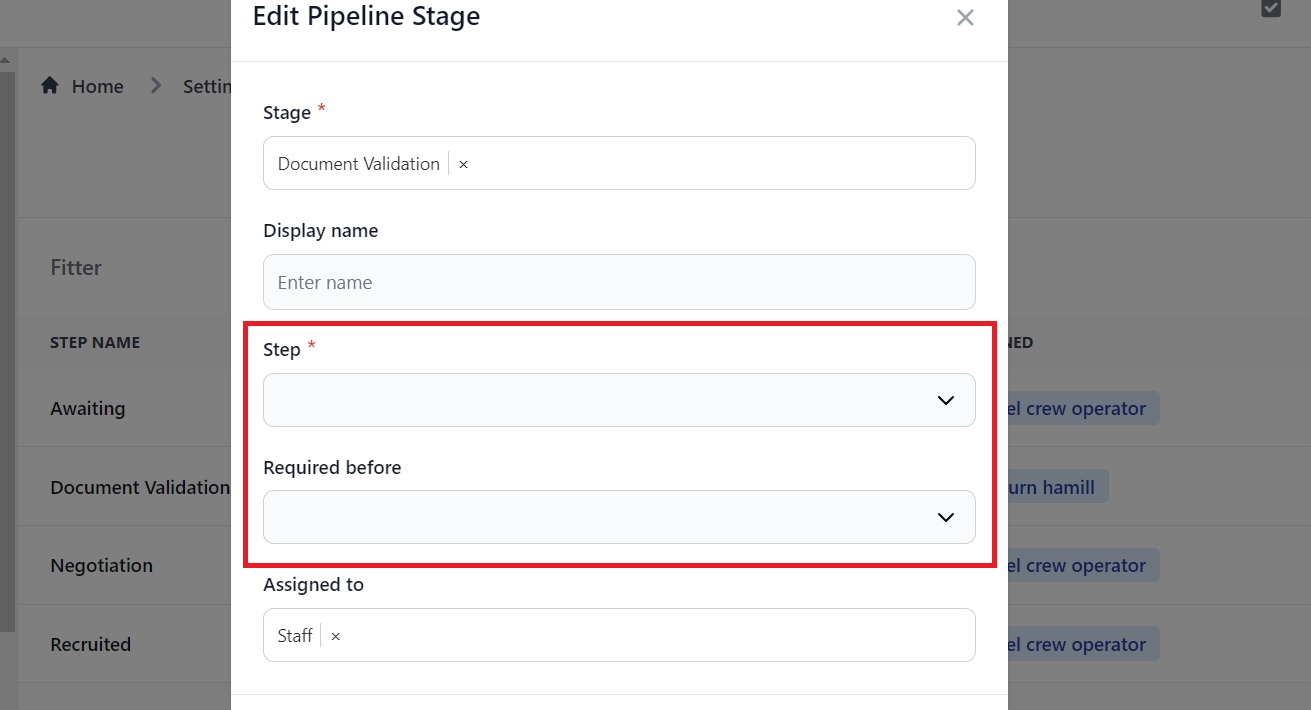
In both Assignment and Recruitment Pipelines, if you set a Medical Check at Step 2 and set Required Before to Step 5 the test can be taken and dealt with while Steps 3 and 4 are in progress but it must be completed before Step 5 can be started.
Some notes about Pipelines
When a Crew Manager creates an Assignment Pipeline they can let their Client edit and approve any Stages.
To learn more about adding Clients, take a look at this page.
The person you assign a Pipeline Stage to may be a User, meaning they will need to take an action. Or they may be a Watcher, meaning they will be kept up-to-date but don't have to do anything. When a Stage is assigned to someone they will get a Notification and if they need to take action, it will be added to their My Tasks page.
If you need further help, please get in touch here.