Recruitments
The Recruitments page is where you can add new seafarers that you might want to hire in the future to the database.
A few notes about the Recruitments page
Martide has two pages which are similar, Recruitments and Assignments. The difference is:
- Recruitments: add candidates to the database so you can hire them in the future.
- Assignments: job vacancies for when you need to hire a seafarer for a contract on a set date.
- A Recruitment has an expiry date of 90 days. After this you must recreate the vacancy if you still want to hire for that rank.
- Recruitments can be displayed on the public jobs page to collect candidate resumes.
- When a candidate applies to a Recruitment and is approved, they will move to the Seafarer database and can then be applied to open Assignments.
- Recruitments can’t be shared by employers with manning agents. Instead there are two ways for crew managers to apply candidates: Make the position public OR create a candidate profile and apply them to the position yourself.
Using the Recruitments page
Log into your Martide account and click on Recruitments in the menu on the left. You will go to this page:
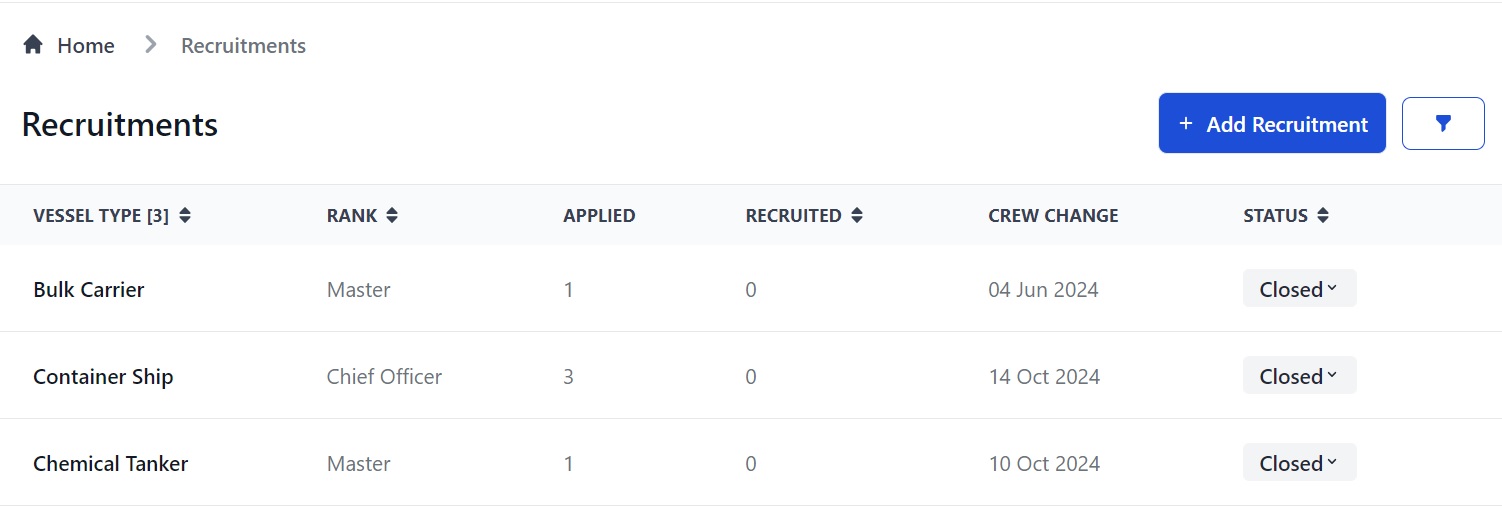
Here you can:
- Add a new Recruitment.
- Filter Recruitments by Vessel Type, Rank, Number of Applied Candidates and Visibility by clicking the funnel icon at the top of the page. This will open up a side menu of the filters.
- View information about the Recruitment: Vessel Type, Rank, Number of Candidates Applied, Number of Candidates Recruited, Crew Change Date and Status.
- Sort results alphabetically or numerically by clicking the 2 arrows next to Vessel Type, Rank, Recruited and Status.
- Edit a Recruitment by clicking the pen icon next to it.
How to add a new Recruitment
Click the Add recruitment button at the top of the page:
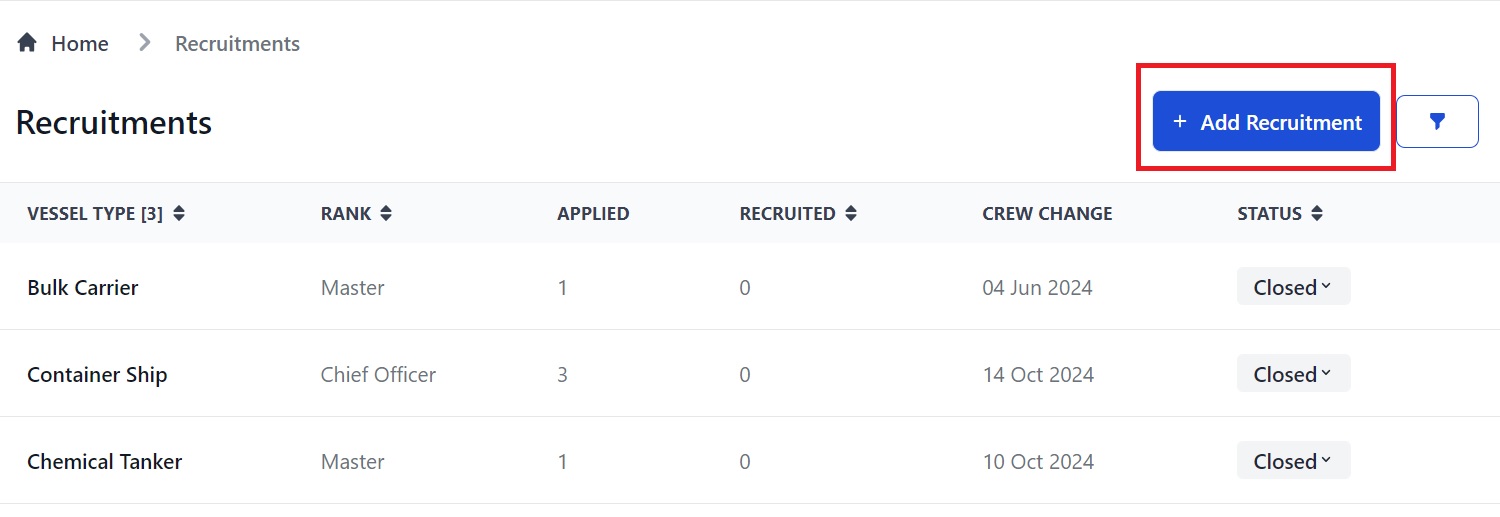
You will go to this page:
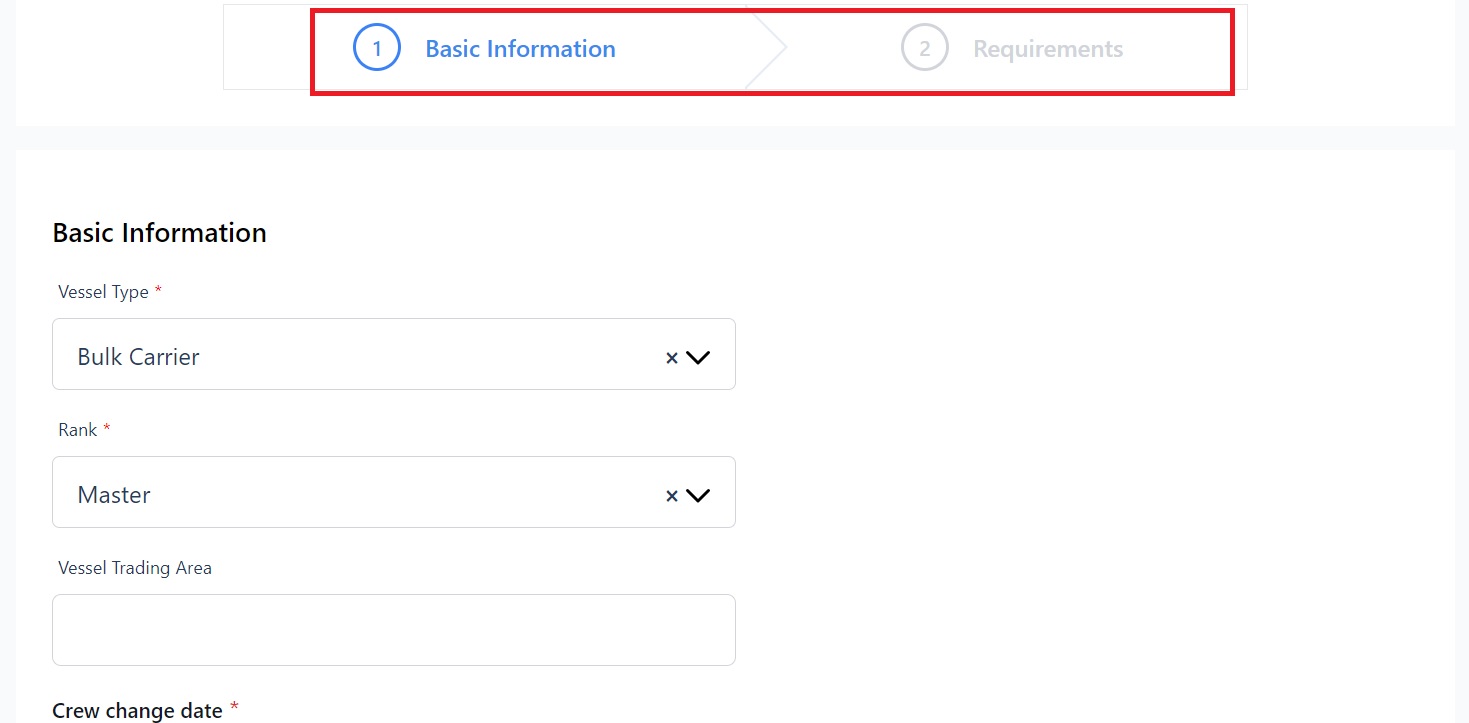
There are 2 parts to adding a Recruitment: Basic Information and Requirements. First we'll add the Basic Information.
On this page you can:
- Enter Vessel Type, Rank and Trading Area.
- Enter the Crew Change Date, select the relevant Data Template and Candidate Pipeline and enter how many candidates of this rank an for this vessel type you need.
- Enter your minimum and maximum budget and the currency.
- Select what nationality you want candidates to be and which visa(s) you need them to hold.
- Enter the contract length and variance.
- Enter the experience you need a candidate to have: time with a technical operator, time in rank, and time on that vessel type.
- Add a job description.
- Set the status to public to advertise your job on Martide's website.
Click Next and you will go to the Requirements page. You can't change anything there, it is just for your information.
Requirements for a Recruitment
The Requirements page looks like this:
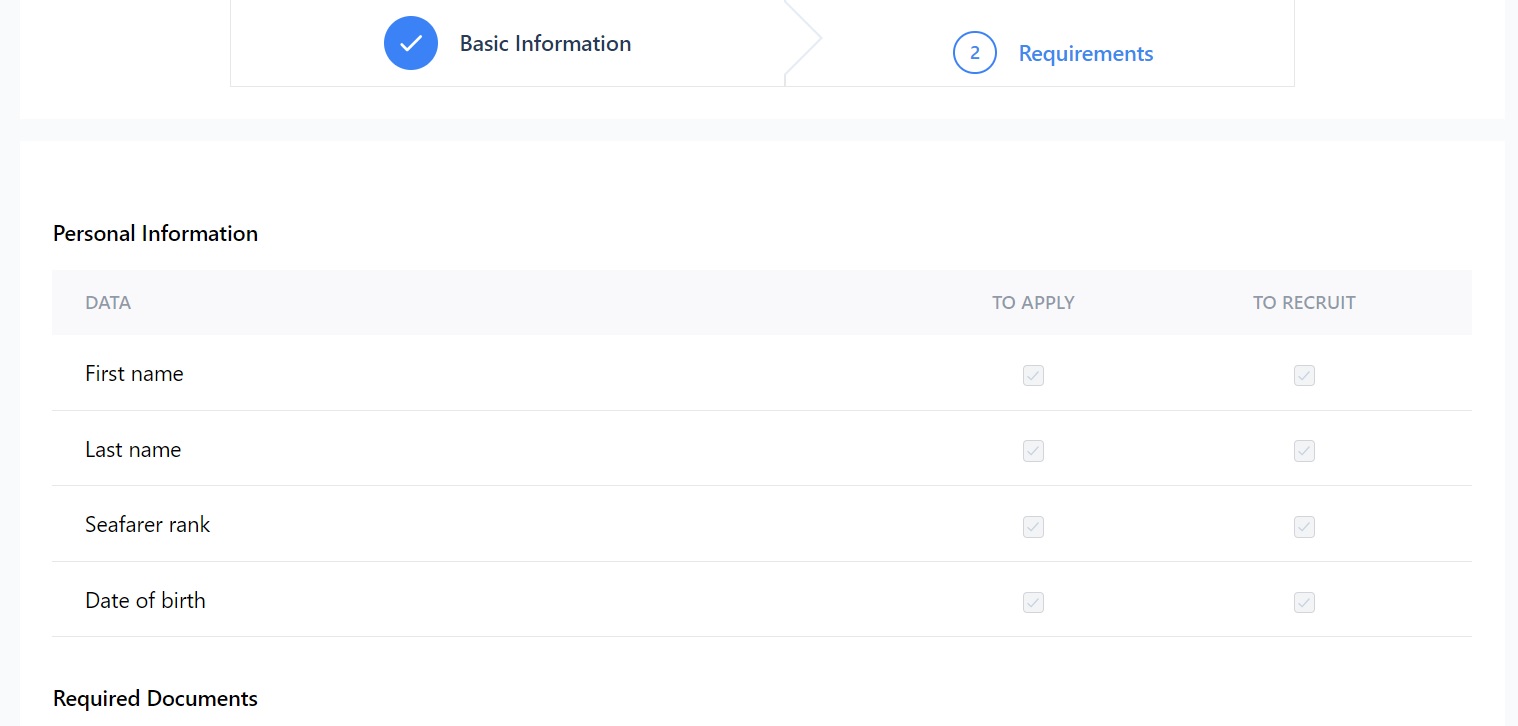
Here you can:
- See which personal information and documents (certificates, medicals etc.) a candidate must have to be able to a) apply and b) be hired for the vacancy.
Note: unless you have used Alternative Documents to override your Data Template, only candidates with all specified documents can apply.
Click Publish Your Job and you will go to your Pipeline where you can add, approve or reject seafarers.
How to approve or reject seafarers
The Pipeline looks like this. Our example has 2 seafarer candidates.
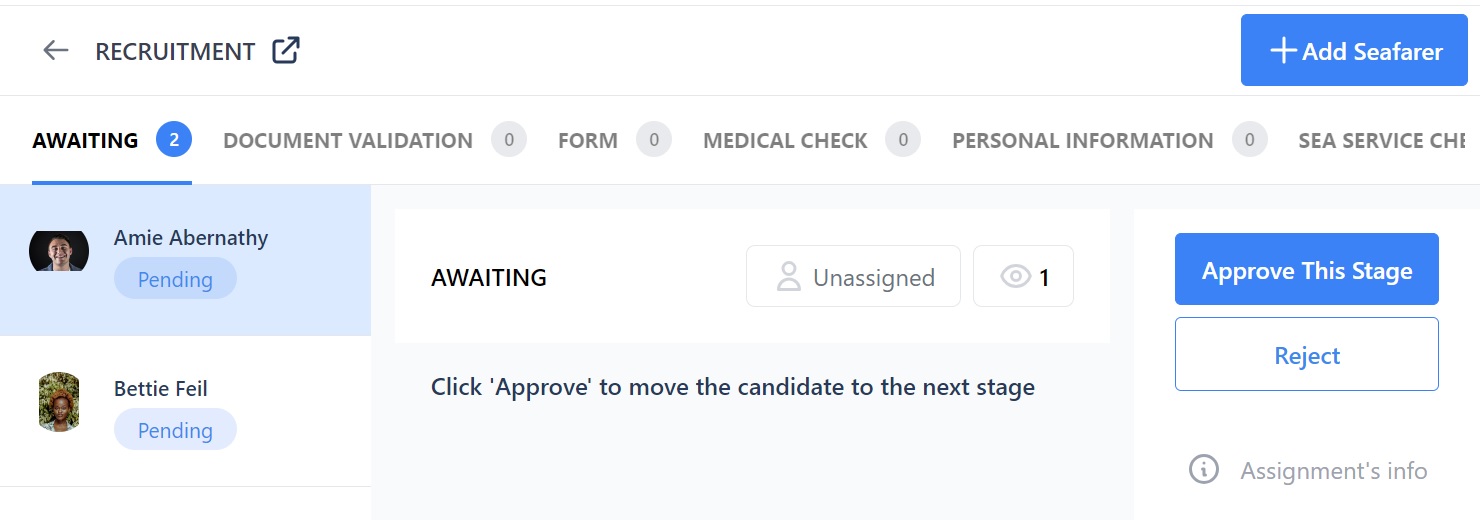
The first stage is always Awaiting and the last is always Recruited. The stages in between will be whatever stages you set in that Pipeline i.e. Negotiation, Document Validation, Visa, Personal Info etc.
Here you can:
- See the name and status of all candidates: Pending, Approved or Rejected.
- See the Pipeline stages for this Recruitment at the top.
- See who this stage has been assigned to and how many people are watching it.
- Click on a seafarer to view their details on the right hand side and then approve them for that stage by clicking Approve This Stage, or reject them by clicking Reject.
- Add a new candidate by clicking the Add Seafarer button.
- See what the job advert looks like on Martide's website by clicking the square and arrow next to the word Recruitment at the top.
When you click Approve This Stage you will see a green notification saying Stage approved, the candidate's status will change to Accepted and they will move to the next stage in the Pipeline:

Click on the next stage - i.e. Document Validation - to enter the required information for that stage: and to continue approving or rejecting the candidate.
Click on any of the headings: Form, Medical Check, Personal Information etc. to see which other candidates are at that stage.
When you have completed all the stages in that Pipeline, the last stage is the Recruited stage, where you can approve the candidate and add them to the database.
How to add a new seafarer to the database
To add a new seafarer to the database, go to the Recruitments page and click the Recruitment you want to add them to.
In our example, we're going to add a candidate to our Bulk Carrier / Master Recruitment:

Click the Vessel Type to go to its Recruitment Pipeline:
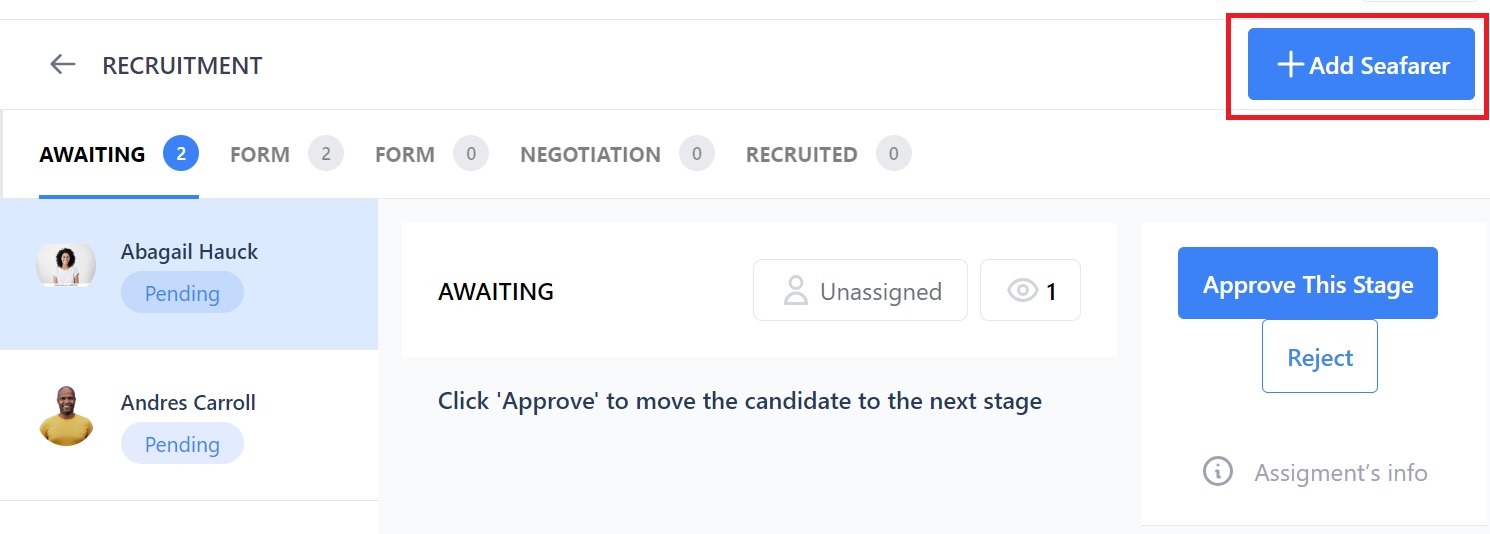
Click the Add Seafarer button. You will go to this page:
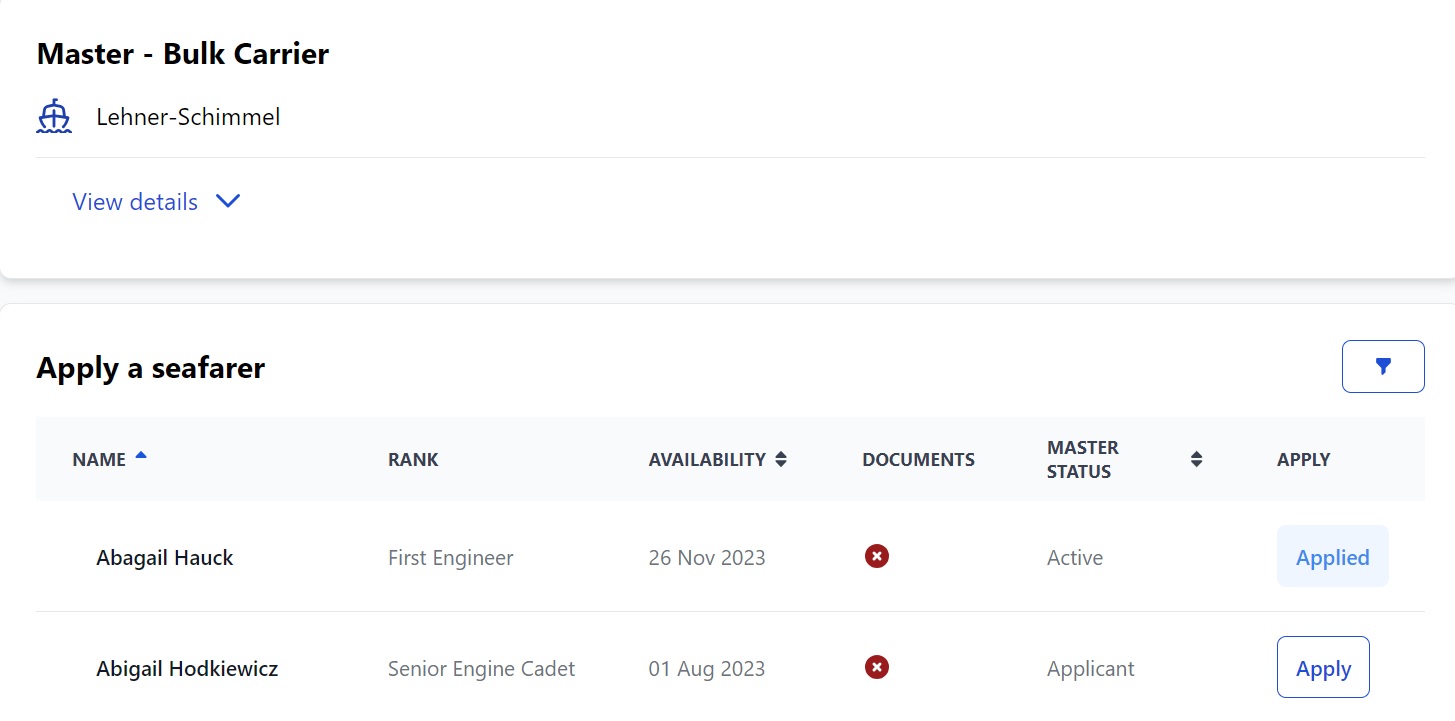
Note: to see the list of seafarers, click the filter icon in the Apply a seafarer section, and then click Clear All.
Here you can:
- See the rank, vessel type and company name at the top.
- Click View details to see more info about the vacancy and vessel.
- See seafarers, their rank, availability, if they have the right documents, and the master status.
- Filter candidates by various searches including name, location, rank, employment history etc. by clicking the funnel icon.
- Apply a seafarer to the job.
When you click the Apply button for a seafarer you will go here:
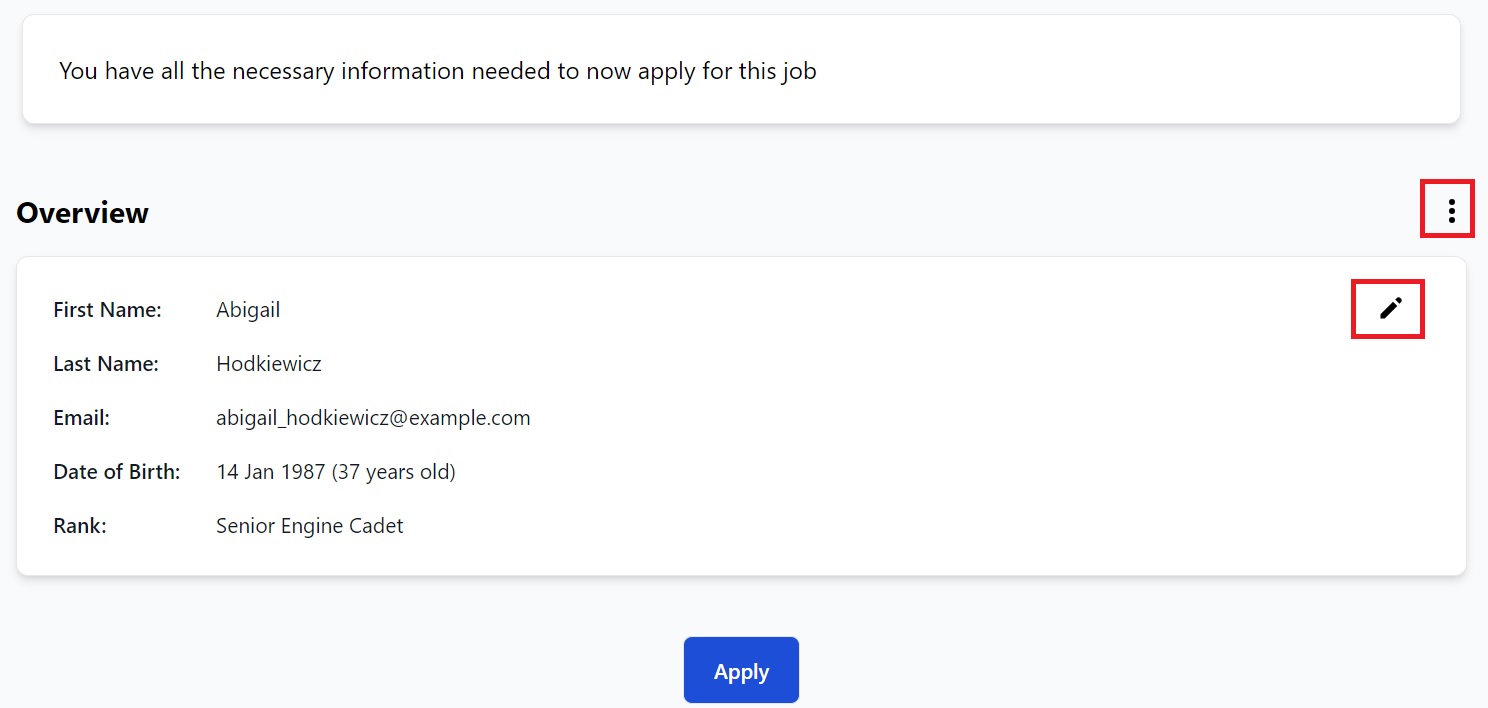
Here you can:
- See if any data or documents are missing. If there are, there will be a warning message at the top. Add anything that is missing to their seafarer profile so you can apply them to the vacancy.
- See the candidate's name and personal details. Edit them by clicking the pen icon.
- Click the 3 dots to download their photo or contracts, to use a Document Assembly template, or to send them a message.
Click the Apply button and the seafarer will be applied to the Recruitment.
How to filter your Recruitments
If you have lots of Recruitments, you can make it easier to find the one you need with the Filter function. Click the funnel icon at the top of the Recruitment page:

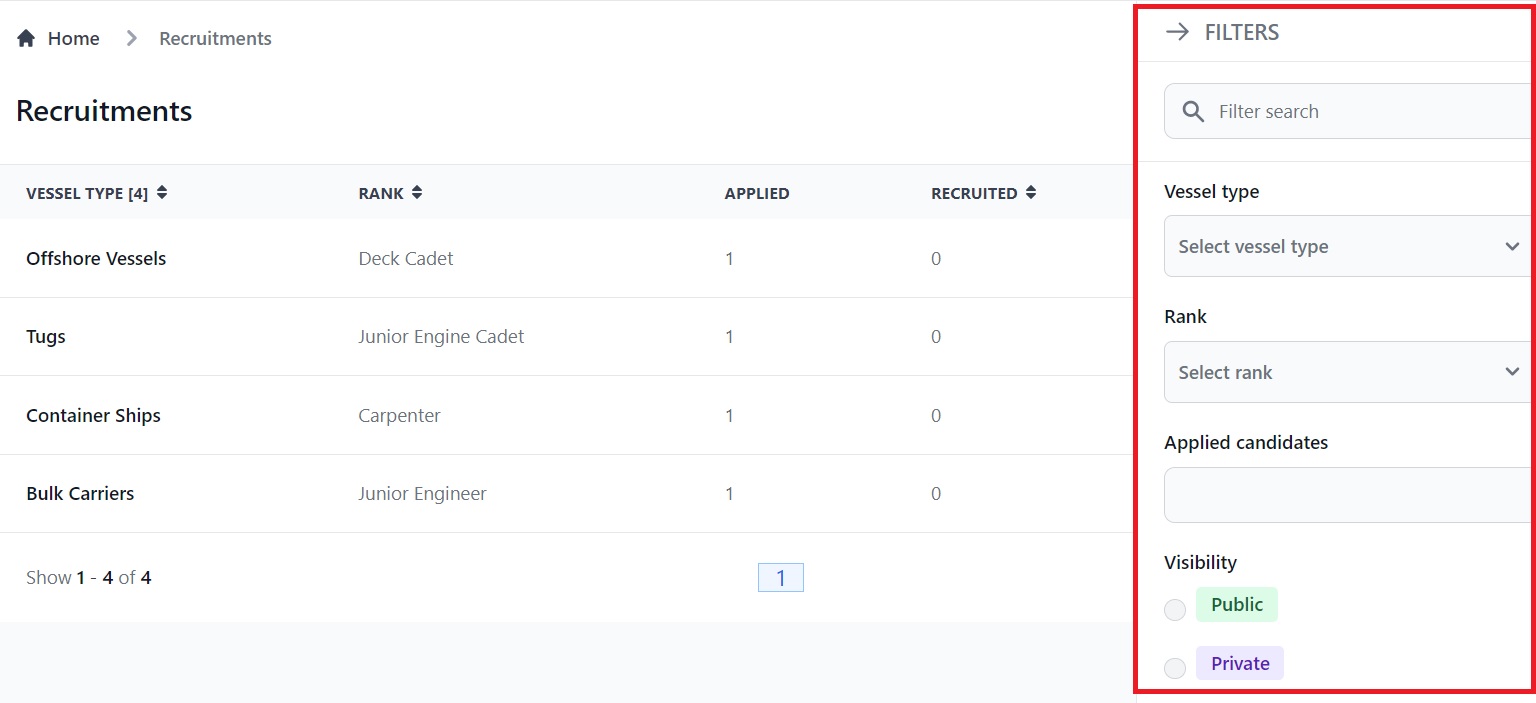
This opens the filters menu where you can search by Vessel Type, Rank, Applied Candidates and Visibility:
A note about Users and Watchers
The person you assign a Pipeline Stage to could be one of your company's users or one of your Vessel Custom Contacts. When a Stage is assigned to someone, they will get a Notification and if they need to take action, it will be added to their My Tasks page.
If someone is a Watcher they will be kept up-to-date via their Notifications but they don't need to do anything.
If you need any further help please get in touch with us here.